This help page is for users in Creator 5. If you are in the newer version (Creator 6), click here. Know your Creator version.
Install the Android core library for the customer app
The core library of Zoho Creator's Android SDK allows you to create custom UI and build an Android app using the data present in your Creator application.
1. Prerequisites
- The latest version of Android Studio
2. Register your Android app with Zoho
- Edit your Zoho Creator application.
- Navigate to its Settings page.
- Click Mobile SDK under Developer Tools.
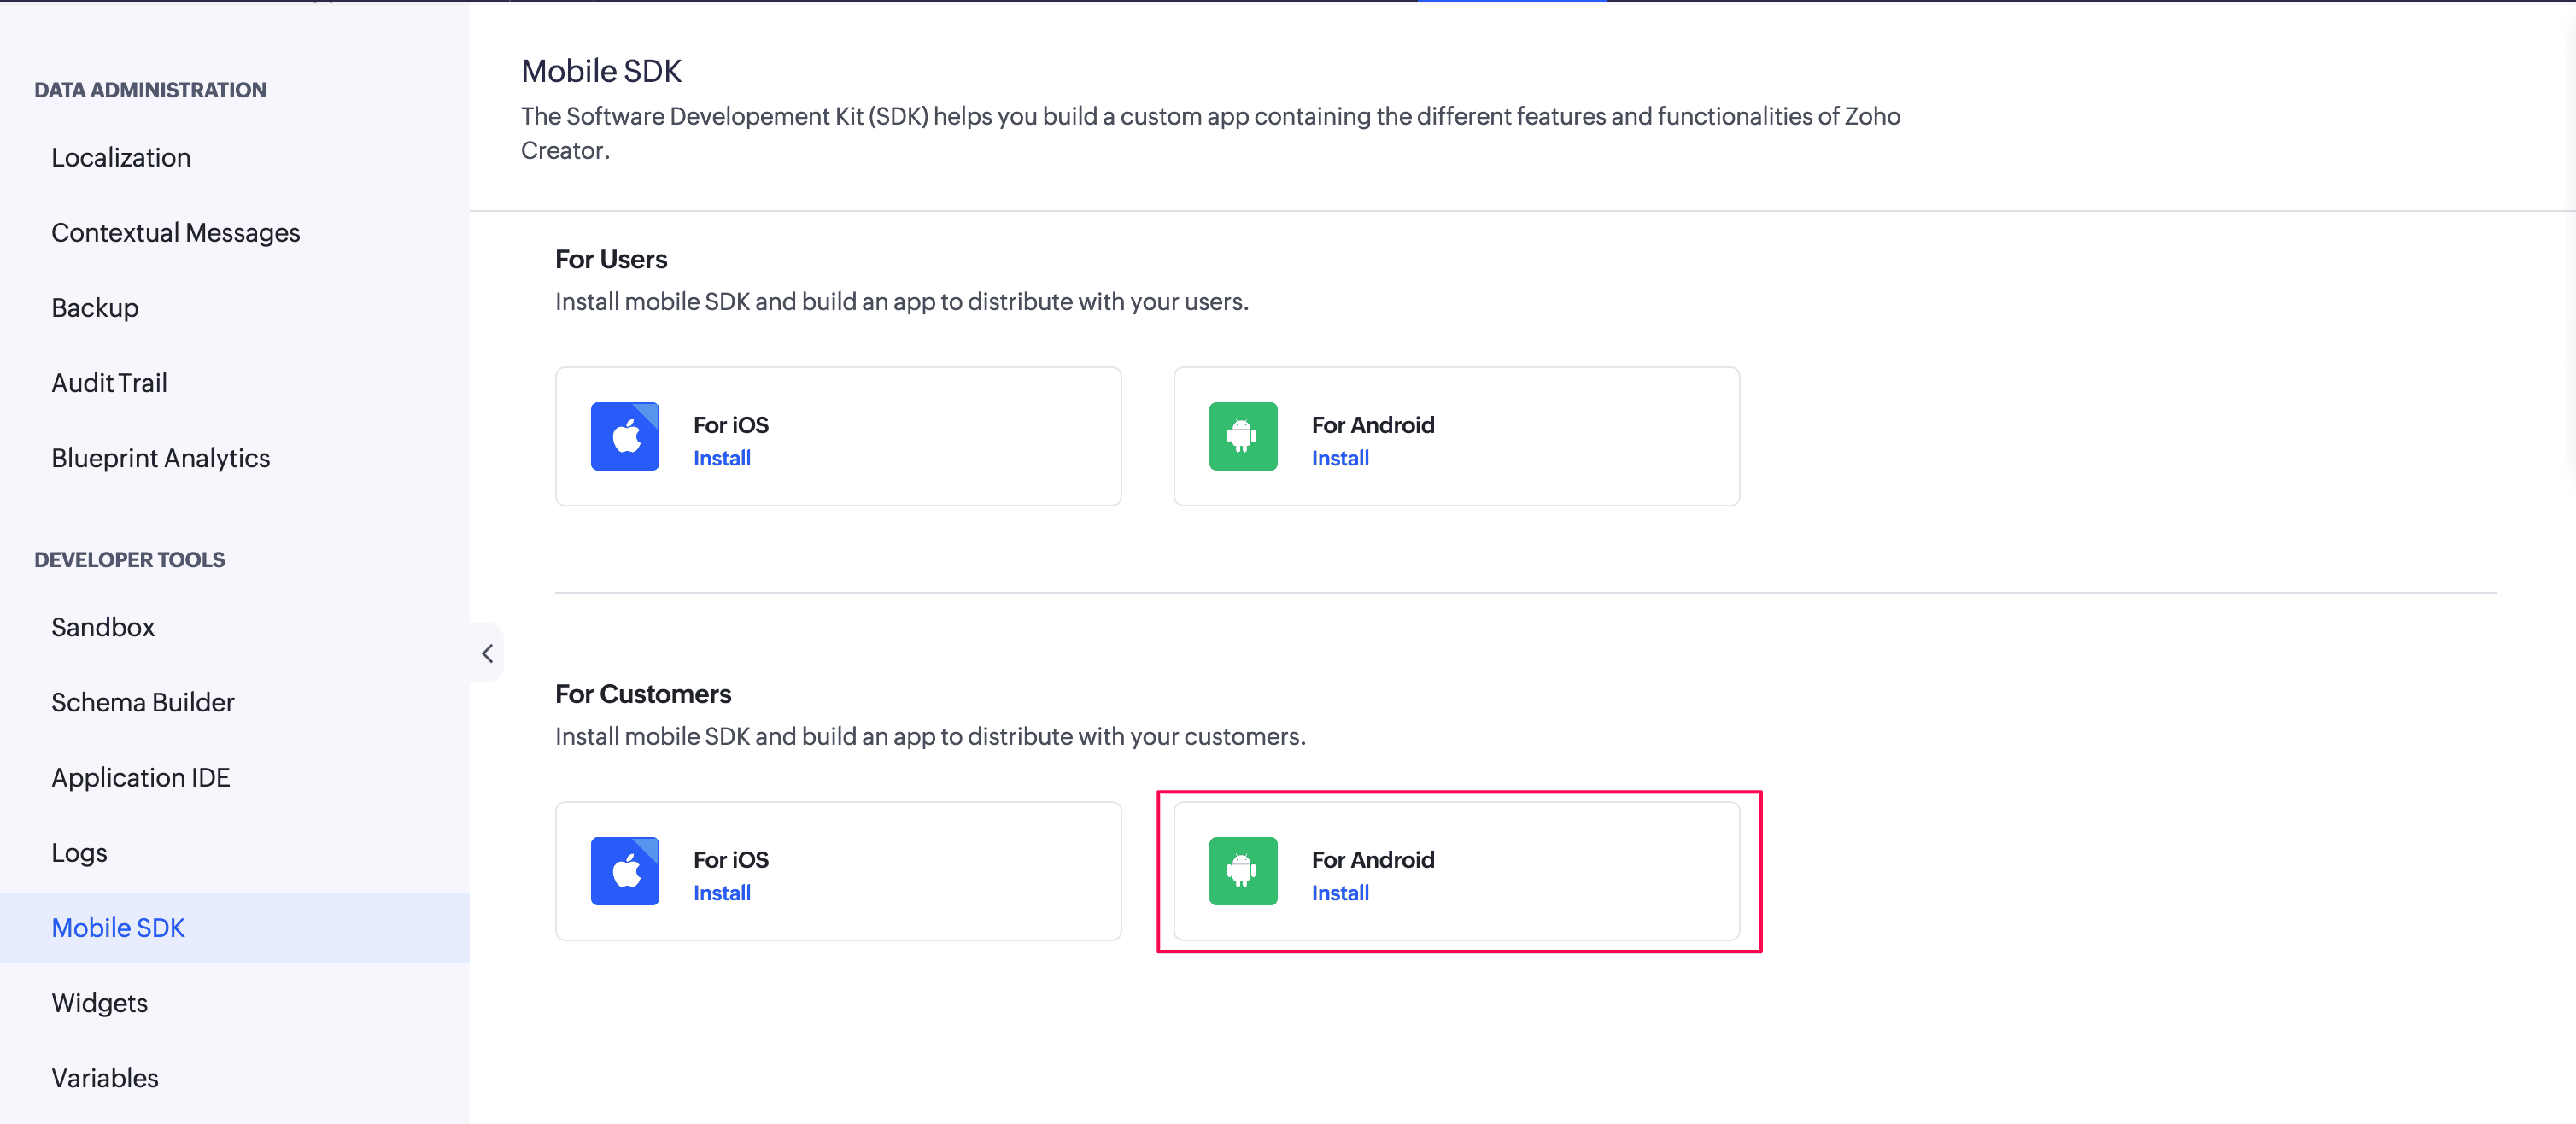
- Under the For Customers section, click For Android. A pane will slide in from the right.
- Select the Core library.
- Click the Generate Client Credentials to create a dedicated token storage entity for an application instance. A popup to configure client details appears.
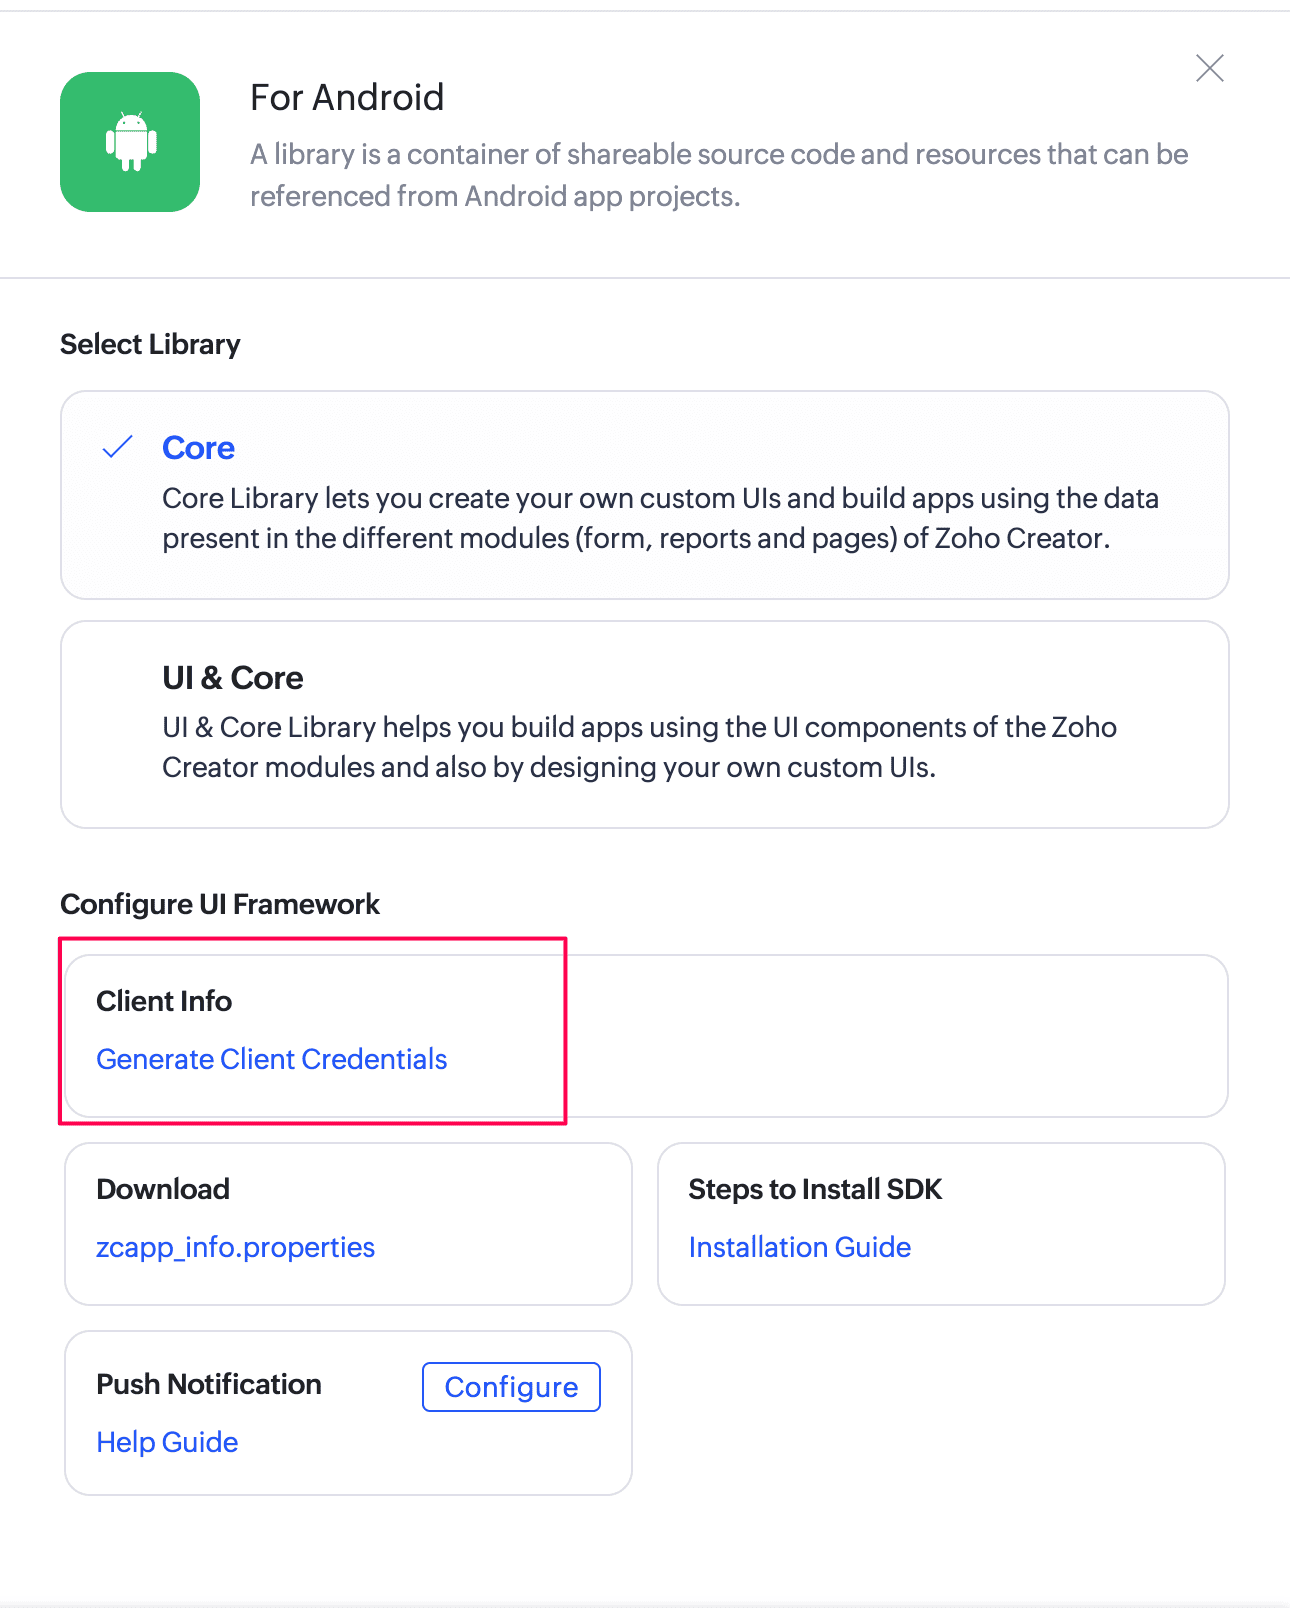
- Fill out a custom Client name and Redirect URI in the respective input fields of the popup. The redirect URI is an application specific unique identifier, used to redirect the user from the browser back to the mobile application after successful authentication. The same URI should be configured in the authentication server.
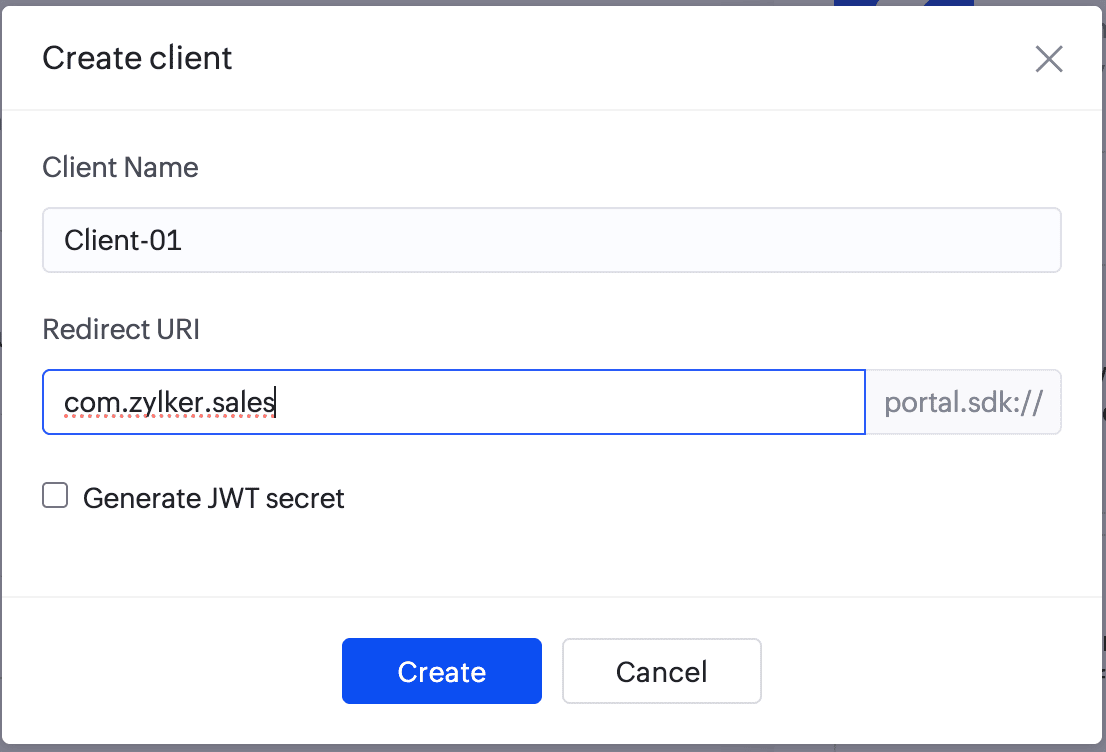
- Tick the Generate JWT Secret checkbox to generate a secret key that can be used as an input to the JWT builder for generating JWT tokens while installing the core framework.
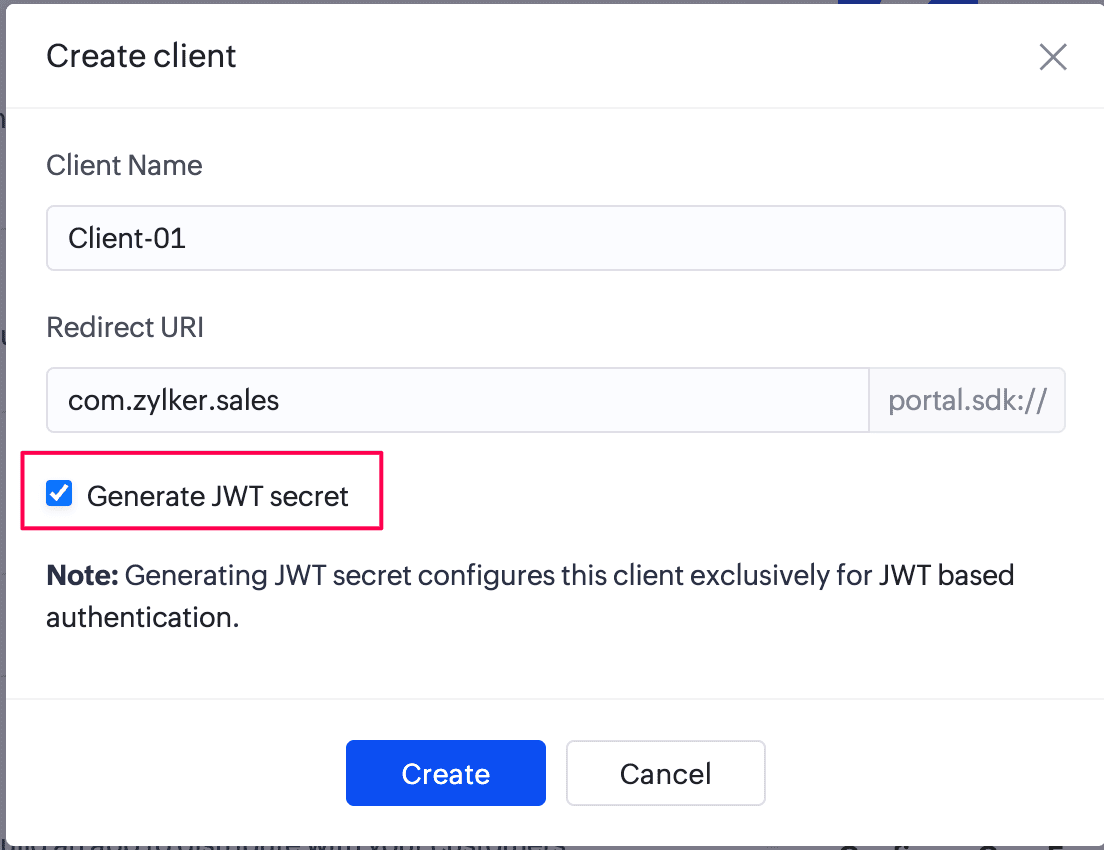
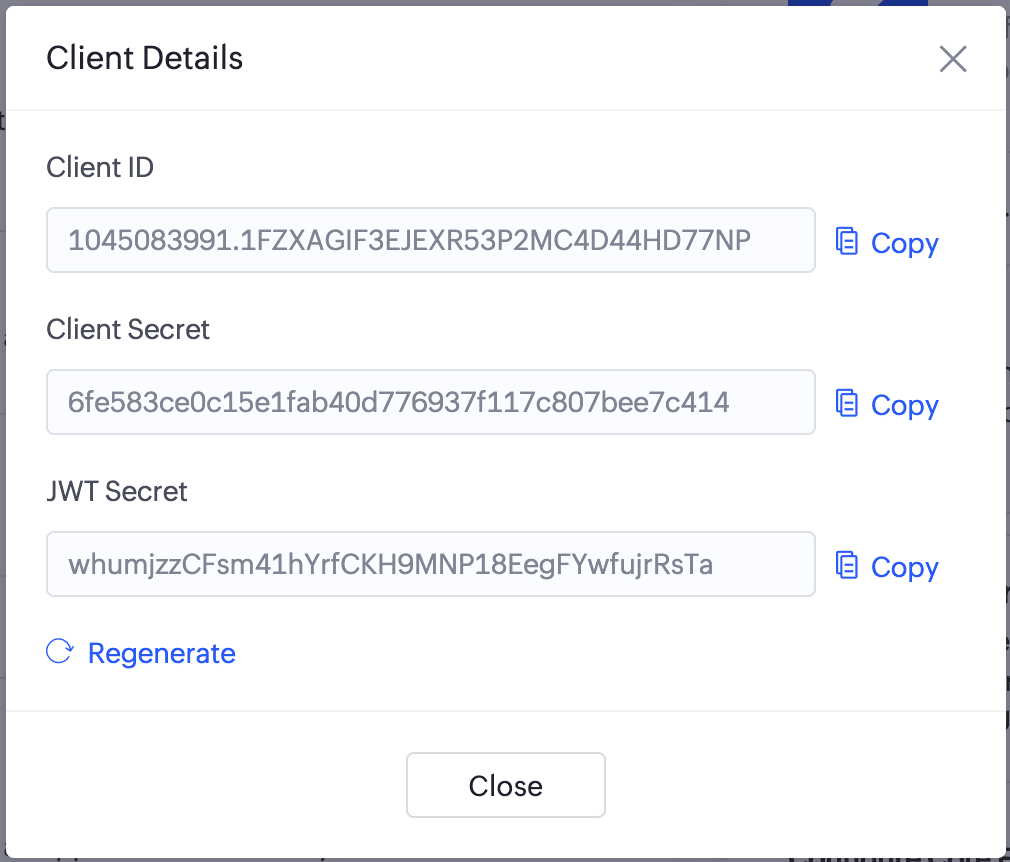
- Click Create to proceed. This will generate the client ID, client secret, and portal ID for the iOS app that you want to integrate with your Creator application. The JWT secret will also be displayed, if the Generate JWT Secret checkbox was selected. Once a client is created, the + Create Client option, allows you to create additional clients for the same application.Note:Generating a JWT secret configures the client exclusively for JWT-based authentication. After the JWT secret is generated, access and refresh tokens can only be requested using "with JWT token" method.
- Downloaded the zcapp_info.properties file, then add it to your project's raw folder: "<your_project_folder>/app/src/main/res/raw". (Create a folder named raw in this location if it doesn't exist)
2.1. Managing clients
The below actions can be performed for a client in the For Customer - SDK configuration pane:
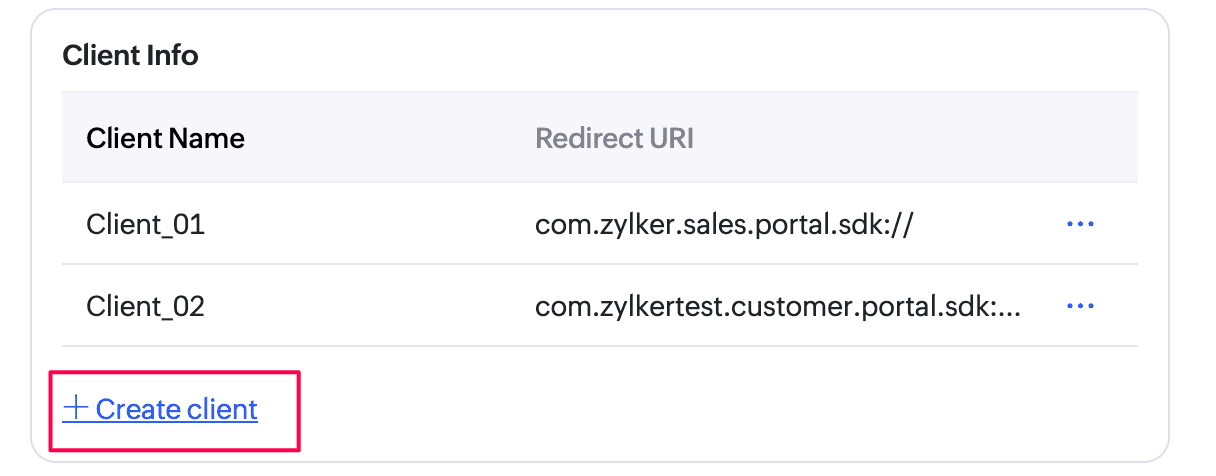
- Create multiple clients: Click +Create Client to add additional clients and generate respective credentials for the Zoho Creator portal application.
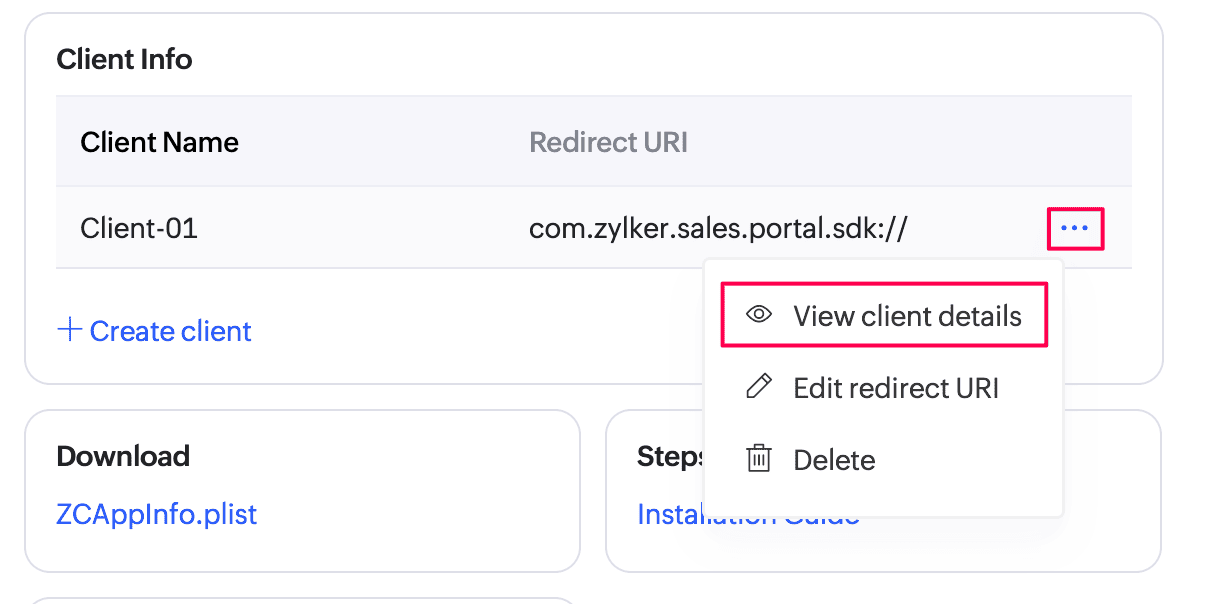
- View client details: Click the horizontal ellipsis () icon next to a client and select View client details. The client ID, client secret, and JWT secret for the selected client are displayed.
- Regenerate JWT secret:
- Click the horizontal ellipsis () icon next to a client and select View client details.
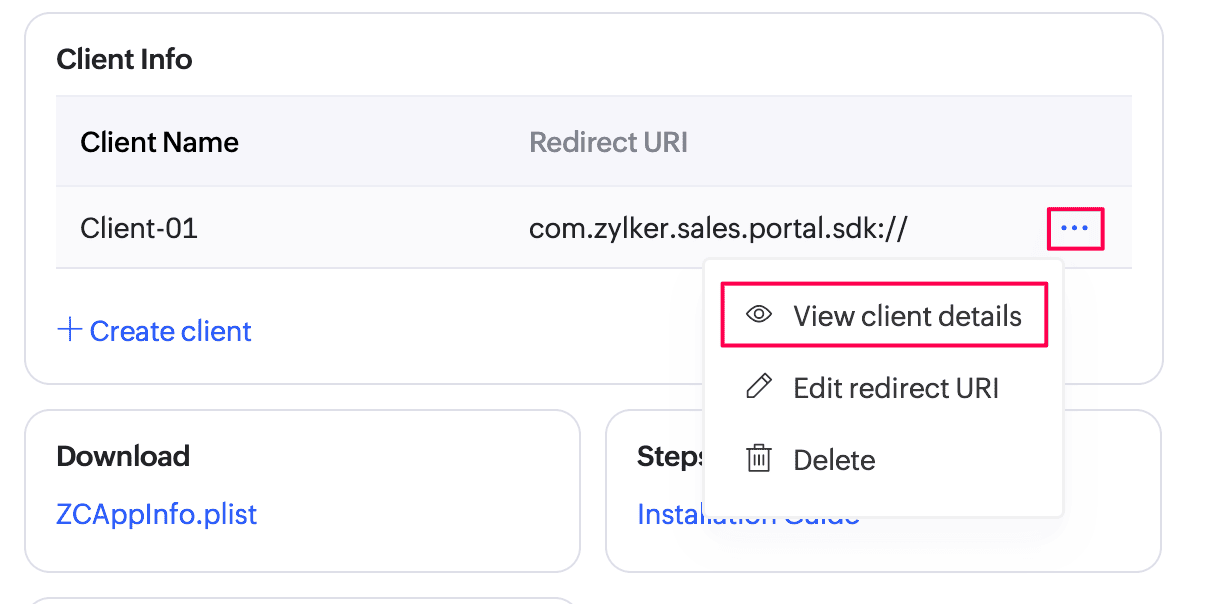
- Click Regenerate under Client Details to generate a new JWT Secret if the existing secret needs to be refreshed for security purposes.
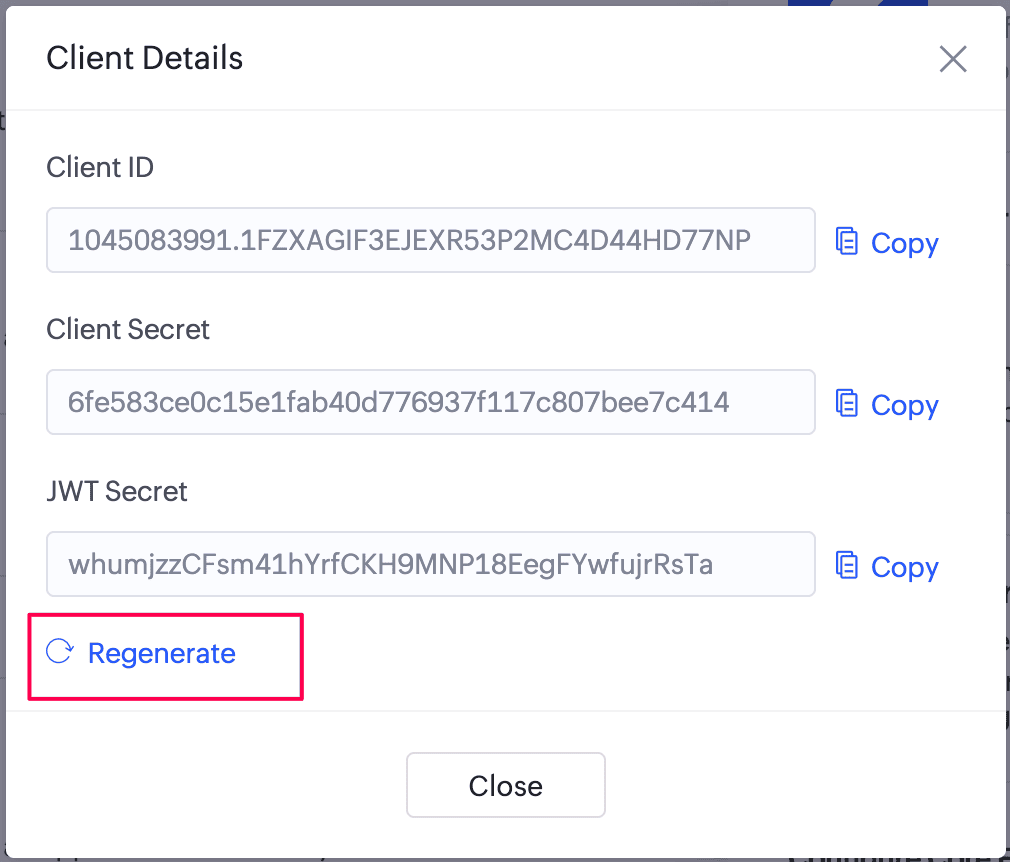
- Click Done to save the changes.
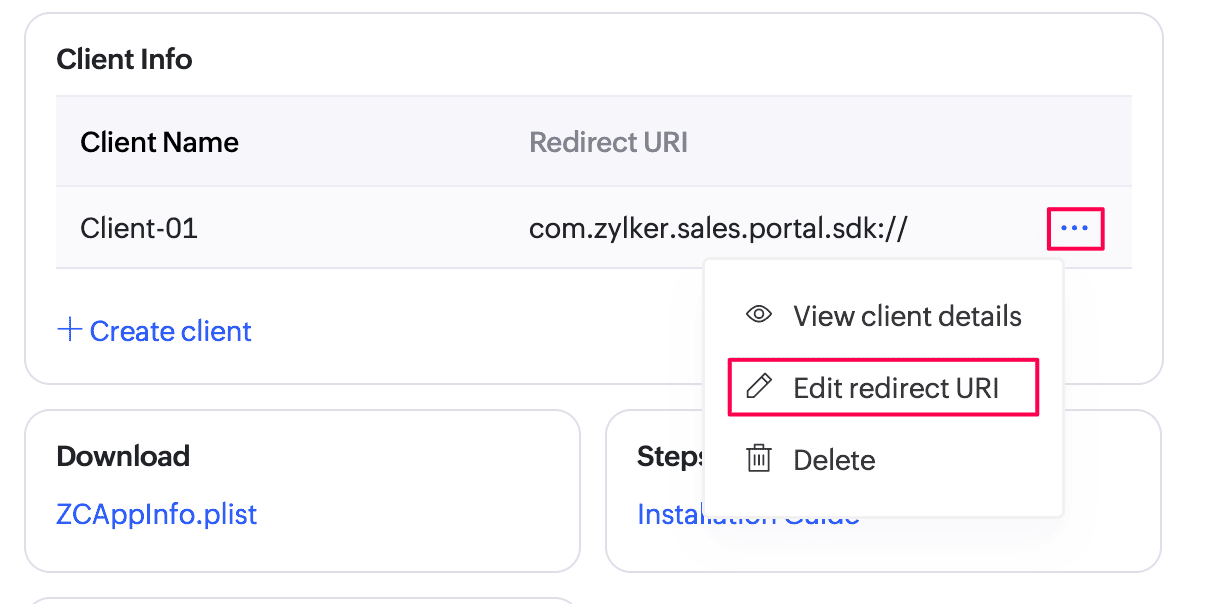
- Edit redirect URI:
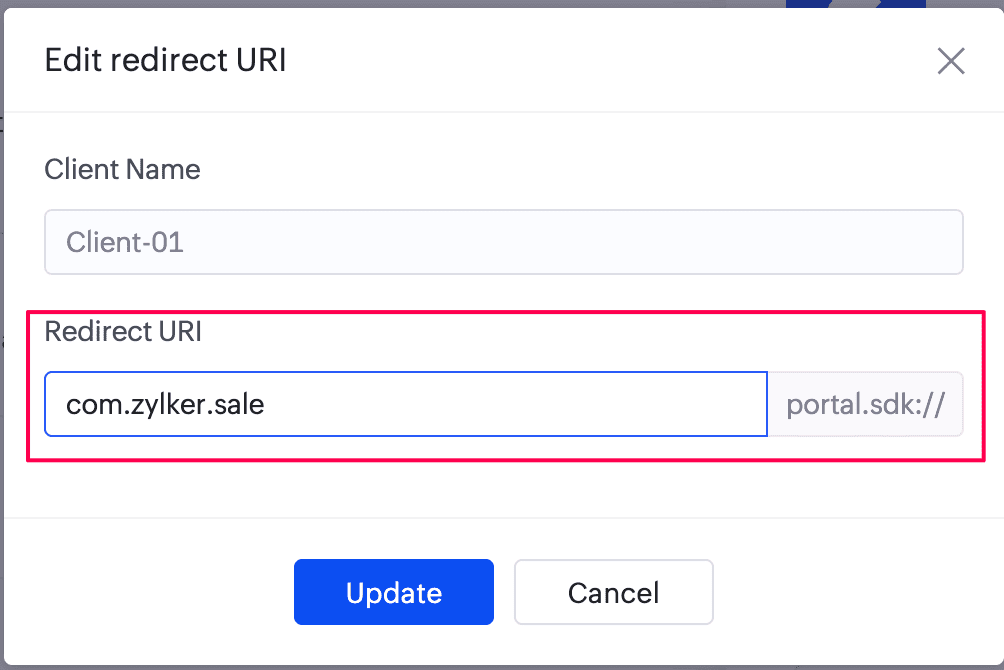
- Click the horizontal ellipsis icon next to a client and select Edit redirect URI.
- Enter the new Redirect URI and click Update to save the changes.
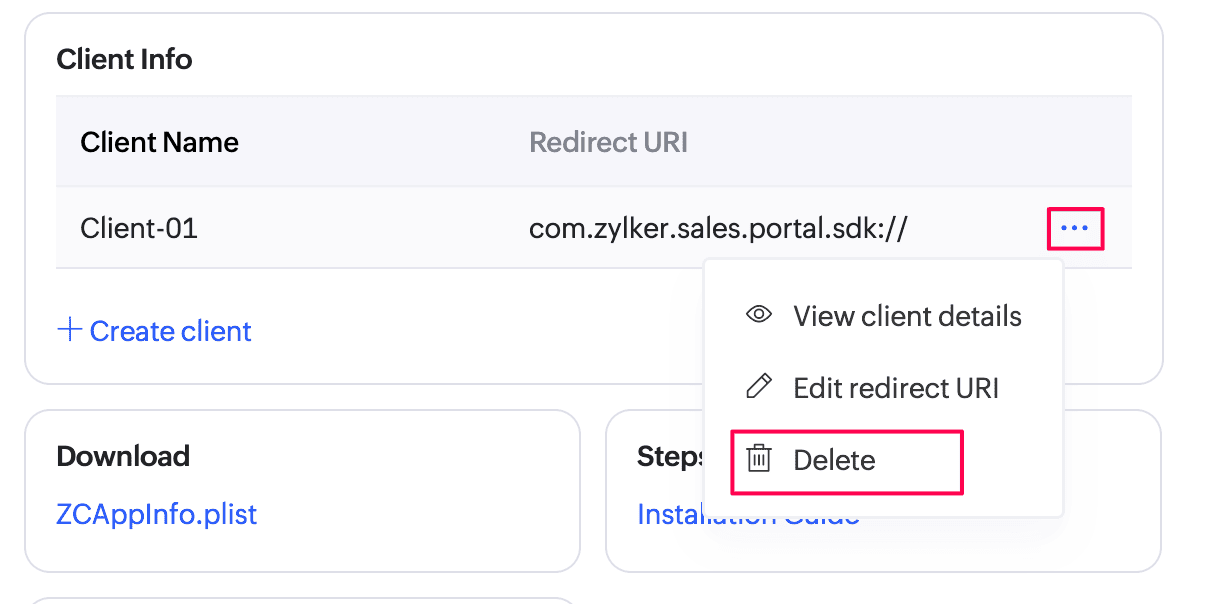
- Delete a client: Click the horizontal ellipsis icon next to a client and select Delete to remove a client. The generated client ID and its authentication credentials will also be removed.
3. Install the Android core library for the customer app
Kotlin
Note: The Android app must have a minimum SDK version 22 or higher.
- Integrate SDK with your Android app:
- Add the Zoho maven repository URL in app/build.gradle:allprojects {
repositories {
google()
mavenCentral()
maven {
url 'https://maven.zohodl.com'
}
}
}Note: While adding the repository URLs in build.gradle you may encounter Build was configured to prefer settings repositories over project repositories issue. To proceed further, you need to add the repository URLs in settings.grade. - Integrate Zoho Creator Core Library & Authentication Library in app/build.gradle:dependencies {
implementation 'com.zoho.creator:creator-core:1.6.0'
implementation 'com.zoho.accounts.android:zaccountsclientportalsdk:V2_0'
} - Click Sync Now in the bar that appears in the IDE.
- Configure your project with the following code:
- Add the below string in the strings.xml of your app:<string name="iam_portal_url">https://accounts.zohoportal.com</string> <!--enter the accounts URL of your respective DC. For eg: EU users use https://accounts.zohoportal.eu-->
<string name="c_id"> GENERATED CLIENT ID </string>
<string name="c_secret"> GENERATED CLIENT SECRET ID </string>
<string name="c_portal"> PORTAL ID </string>
<string name="redir_url"> REGISTERED REDIRECT URI</string> - In the oncreate method in your application / activity class, Initialize the Accounts SDK as follows:
IAMClientSDK.getInstance(this).init(scopes)where scopes - "aaaserver.profile.READ,zohocontacts.userphoto.READ,ZohoContacts.contactapi.READ,
ZohoCreator.meta.CREATE,ZohoCreator.meta.READ,ZohoCreator.meta.UPDATE,
ZohoCreator.meta.DELETE,ZohoCreator.data.CREATE,ZohoCreator.data.READ,
ZohoCreator.data.UPDATE,ZohoCreator.data.DELETE,ZohoCRM.modules.READ,
ZohoCRM.users.READ"Note: The scope list have been updated for version 1.4 and above. - Create an Activity called HandleRedirectActivity and add the following code to its oncreate method:
IAMClientSDK.getInstance(this).handleRedirection(this) - Add the following code to the AndroidManifest.xml file:<activity android:name=".HandleRedirectActivity" android:exported="true">
<intent-filter>
<action android:name="android.intent.action.VIEW" />
<category android:name="android.intent.category.DEFAULT" />
<category android:name="android.intent.category.BROWSABLE" />
<data android:scheme="<REDIRECT_URI_WITHOUT_COLON_AND_SLASH>" />
</intent-filter>
</activity> - To open the login screen, add the below code snippet:
If you enabled Generate JWT token while creating the client, add the code snippet in the With JWT token tab. Otherwise, add the code in the Without JWT token tab.val sdk = IAMClientSDK.getInstance(applicationContext) if (!sdk.isUserSignedIn) { sdk.presentLoginScreen(this, object : IAMTokenCallback { override fun onTokenFetchInitiated() { } override fun onTokenFetchComplete(zohoToken: IAMToken) { //<This method will be called after user logged-in successfully> } override fun onTokenFetchFailed(zohoErrorCodes: IAMErrorCodes) { //<This method will be called if any error occurred in the login. You will receive the error code in this callback.> } }, null) } else { // start intent to your first activity }val sdk = IAMClientSDK.getInstance(applicationContext) if (!sdk.isUserSignedIn) { IAMClientSDK.getInstance(context).getRemoteTokenWithJWTToken(jwtToken, <PORTAL ID>, object : IAMTokenCallback { override fun onTokenFetchInitiated() { } override fun onTokenFetchComplete(token: IAMToken) { //<This method will be called after user logged-in successfully> } override fun onTokenFetchFailed(errorCode: IAMErrorCodes) { if (errorCode == IAMErrorCodes.user_cancelled) { return } //<This method will be called if any error occurred in the login. You will receive the error code in this callback.> } }) } else { // start intent to your first activity } - Implement the Creator Authentication interface ZCOauthHelper as follows:
class ZCAuthImpl(private val context: Context) : ZCOauthHelper { @Throws(ZCException::class) override suspend fun getAccessToken(): String? { return suspendCoroutine { continuation -> IAMClientSDK.getInstance(context).getToken(object : IAMTokenCallback { override fun onTokenFetchInitiated() { } override fun onTokenFetchComplete(token: IAMToken) { continuation.resumeWith(Result.success(token.token)) } override fun onTokenFetchFailed(errorCode: IAMErrorCodes) { continuation.resumeWith(Result.success(null)) } }) } } override fun getInitialScopes(context: Context): String { return "" } override fun isUserSignedIn(): Boolean { return IAMClientSDK.getInstance(context).isUserSignedIn } override fun getUserData(): Any? { return null } override fun getTransformedUrl(url: String): String { return url } override fun checkAndLogout(): Boolean { return false } override fun isEnhanceTokenNeeded(newScopes: String): Boolean { return false } override fun enhanceToken(tokenHelper: ZCOauthHelper.ZCOAuthTokenHelper, newScopes: String) { } override fun enhanceTokenWithOnDemandScope(tokenHelper: ZCOauthHelper.ZCOAuthTokenHelper) { } } - Add the below code snippet to your application's / activity's oncreate method to set the instance of Authentication interface to the Creator SDK:
ZCAPIUtil.setOAuthHelper(ZCAuthImpl(applicationContext)) - Initialize the ZohoCreator SDK in your application's / activity's oncreate method:
ZCAPIUtil.initialize(applicationContext)
FAQ
- I'm getting merge conflicts while generating a build. How to resolve them?
Please add tools:replace="android:allowBackup" under the application tag in the AndroidManifest.xml file and try again. - I get the "Duplicate class android.support.v4.app" error. What should I do?
To resolve this error, you'll need to add android.enableJetifier=true in gradle.properties file - I get the "Duplicate class androidx.lifecycle.ViewModelLazy found in modules jetified" error. What should I do?
To resolve this error, please add implementation 'androidx.lifecycle:lifecycle-viewmodel-ktx:2.4.0' to your dependency list
References
- Android SDK documentation for detailed information about the various SDK methods.