
Online Reimbursements via ICICI Bank
Reimburse your employees’ expense reports from within Zoho Expense, using the ICICI Bank integration. Reimburse your employees online and help them receive timely repayments for the business expenses they’ve incurred.
Notes:
This integration is available only for users of the India edition of Zoho Expense created under the zoho.in domain.
This integration is currently available only upon request. If you’d like to use it, contact us at icici-support@zohofinance.com. However, organizations that have already set up the integration can continue using it.
Connect to ICICI Bank
Connect your corporate bank account to Zoho Expense by following these simple steps:
Enable the Integration
Reimbursers who are also Admins can enable the integration by following the steps mentioned below:
- Navigate to the Admin View.
- Go to Settings on the left sidebar.
- Go to Online Reimbursements under Integrations.
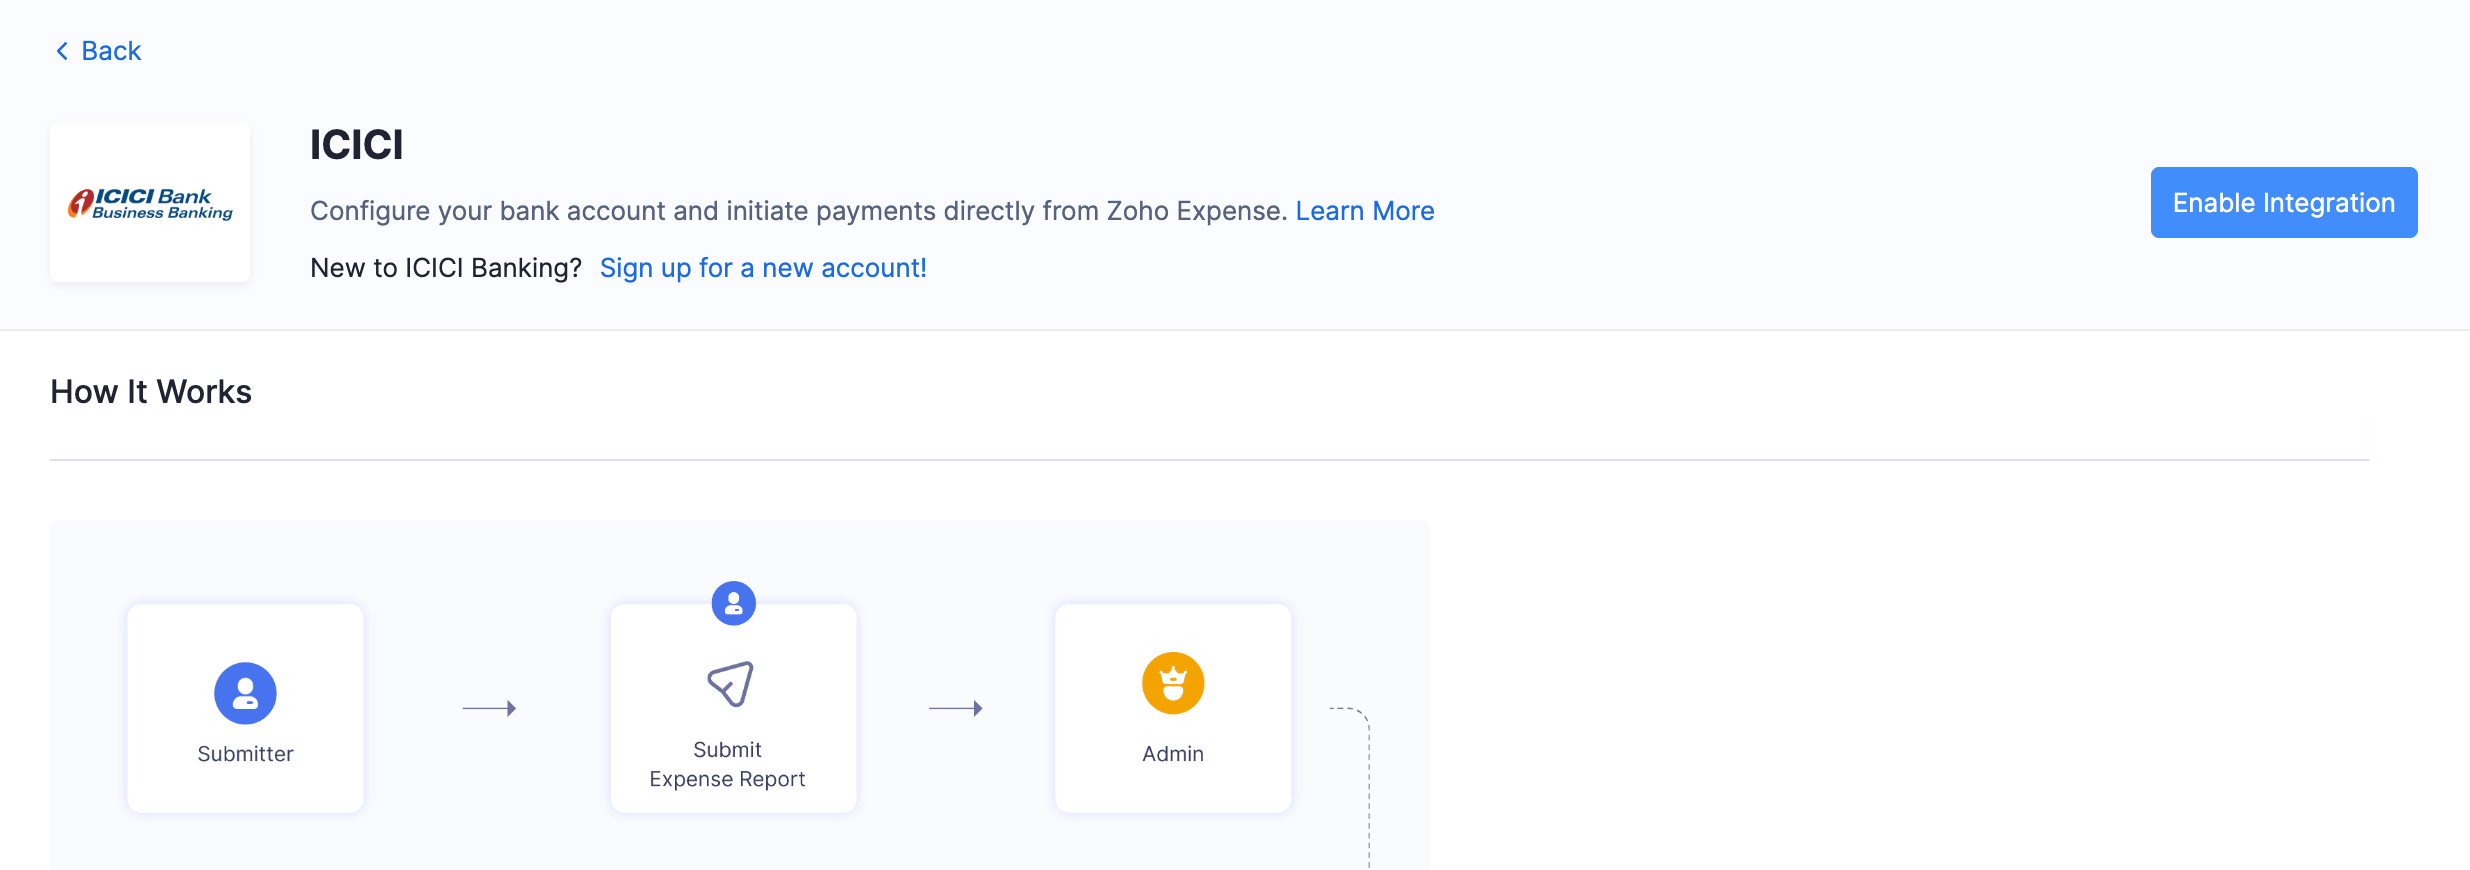
- Click ICICI.
To continue setting up the integration, choose one of the following options based on whether you already have an ICICI Bank Current Account:
- If you are a new user to ICICI Bank
- If you are an existing user of ICICI Bank
If you are a new user to ICICI Bank:
- Request for a new current account by clicking Sign up for a new account under ICICI Bank.
- Enter your name and contact details in the screen that follows.
- Read and agree to the terms and click Proceed. You will be redirected to ICICI Bank to complete the setup. (The bank executives might get in touch with you to complete the process.) Once that’s done, you can set up the integration using your User ID and Corporate ID.
If you are an existing user of ICICI Bank:
- Click Enable Integration.
- In the pop-up that appears, enter your CIB Portal Login ID if you’ve created one in the portal. If you haven’t created one earlier, enter your credentials in this format: CorporateID.UserID.
- Enter your Corporate ID and User ID. You can find them both in ICICI’s CIB portal under Profile > Personal Details.
Prerequisite: Your Corporate ID and User ID will be populated if your CIB Portal’s Login ID format is CorporateID.UserID.
- Click Save. You will have initiated the integration.
Warning: Once you have set up the integration with these credentials, you will not be able to edit them in Zoho Expense. You must delete the integration and set it up once again with the new credentials.
Verify Documents
After initiating the integration in Zoho Expense, you will have to contact your bank or relationship manager to complete the document verification. You will be required to submit the documents communicated by the ICICI Bank representative for verification. Once you’ve submitted your documents, please wait for your bank or relationship manager to confirm that the verification is complete.
Note: ICICI Bank may charge a processing fee for this process.
Approve in ICICI CIB Portal
After verifying the documents, you need to approve it in the CIB Portal. Until then, your Account Status will be Pending.
To approve the integration:
- Click Approve in ICICI CIB Portal next to the Pending status.

Insight: If you haven’t created a Login ID for your CIB Portal, enter your CorporateID.UserID in the given field.
- Click Proceed to login.
- Go to Connected Banking and click the Connected Banking Approvals tab.
- Check the box near the Corporate ID and User ID that you would like to approve.
- Read the terms and conditions and click Approve.
- In the screen that follows, enter the One Time Password sent to your registered mobile number and click Confirm.
- Check the status of the integration in Zoho Expense by clicking Check Status in the integration page.
- Once the integration is active, you will receive a notification in Zoho Expense and your account status will be Active.
Add Bank Account
Once your integration is active, you can add your primary account to make reimbursements to your employees. Here’s how:
- In the Integration Details tab, click Edit above the details table.
- In the pop-up, click the Bank Account dropdown. Click + Add New to include a new account or choose an existing ICICI Bank account.
- If you choose to add a new account, enter your bank account details in the pop-up and click Save. This account will be your default account while initiating reimbursements.
Reimburse Your Employees from Zoho Expense
After enabling the integration and adding the bank accounts, admins and the users with reimbursement permissions will be able to reimburse the approved reports via ICICI Bank.
Note: If you have any queries regarding the ICICI bank integration, write to us at icici-support@zohofinance.com
To reimburse your employees:
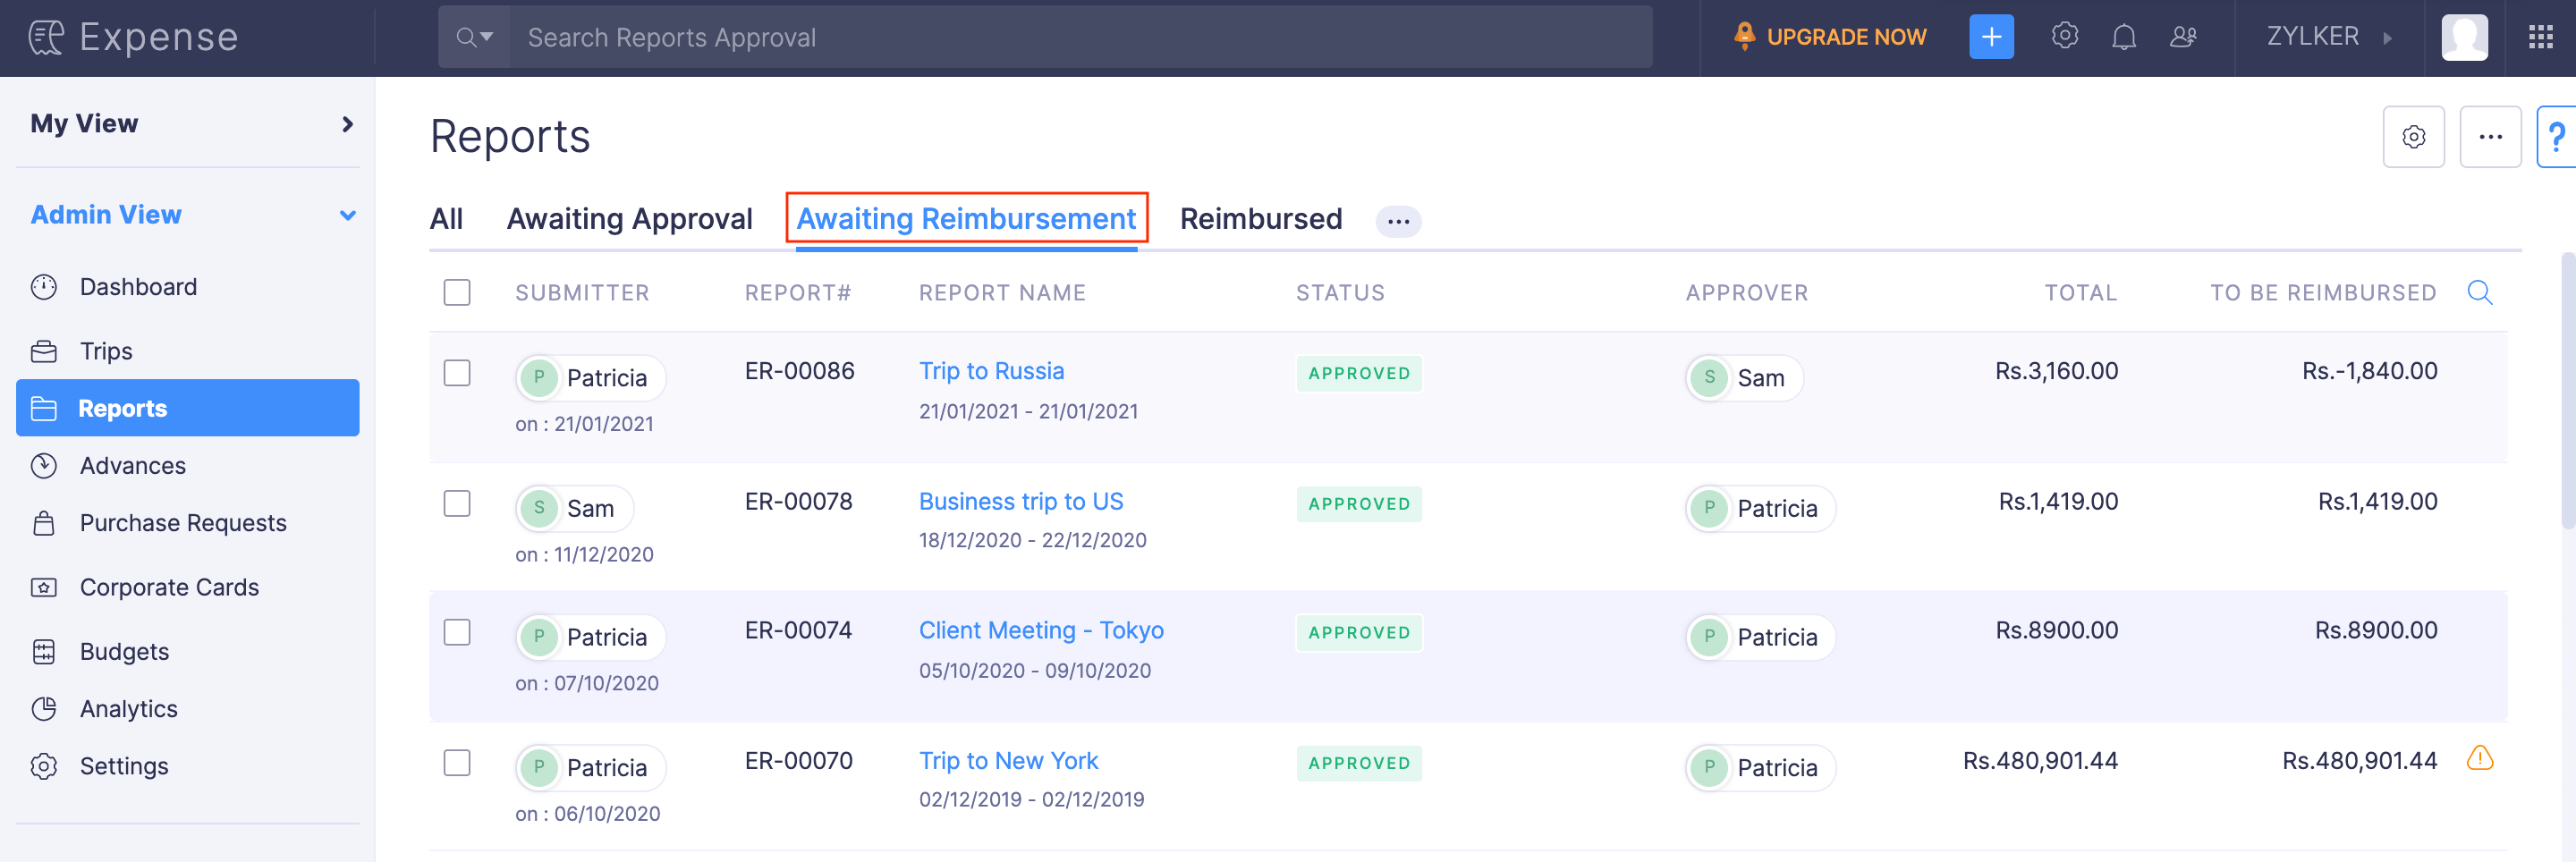
- Click Admin View.
- Go to Reports.
- Navigate to the Awaiting Reimbursement tab.
- Click the report you want to reimburse.
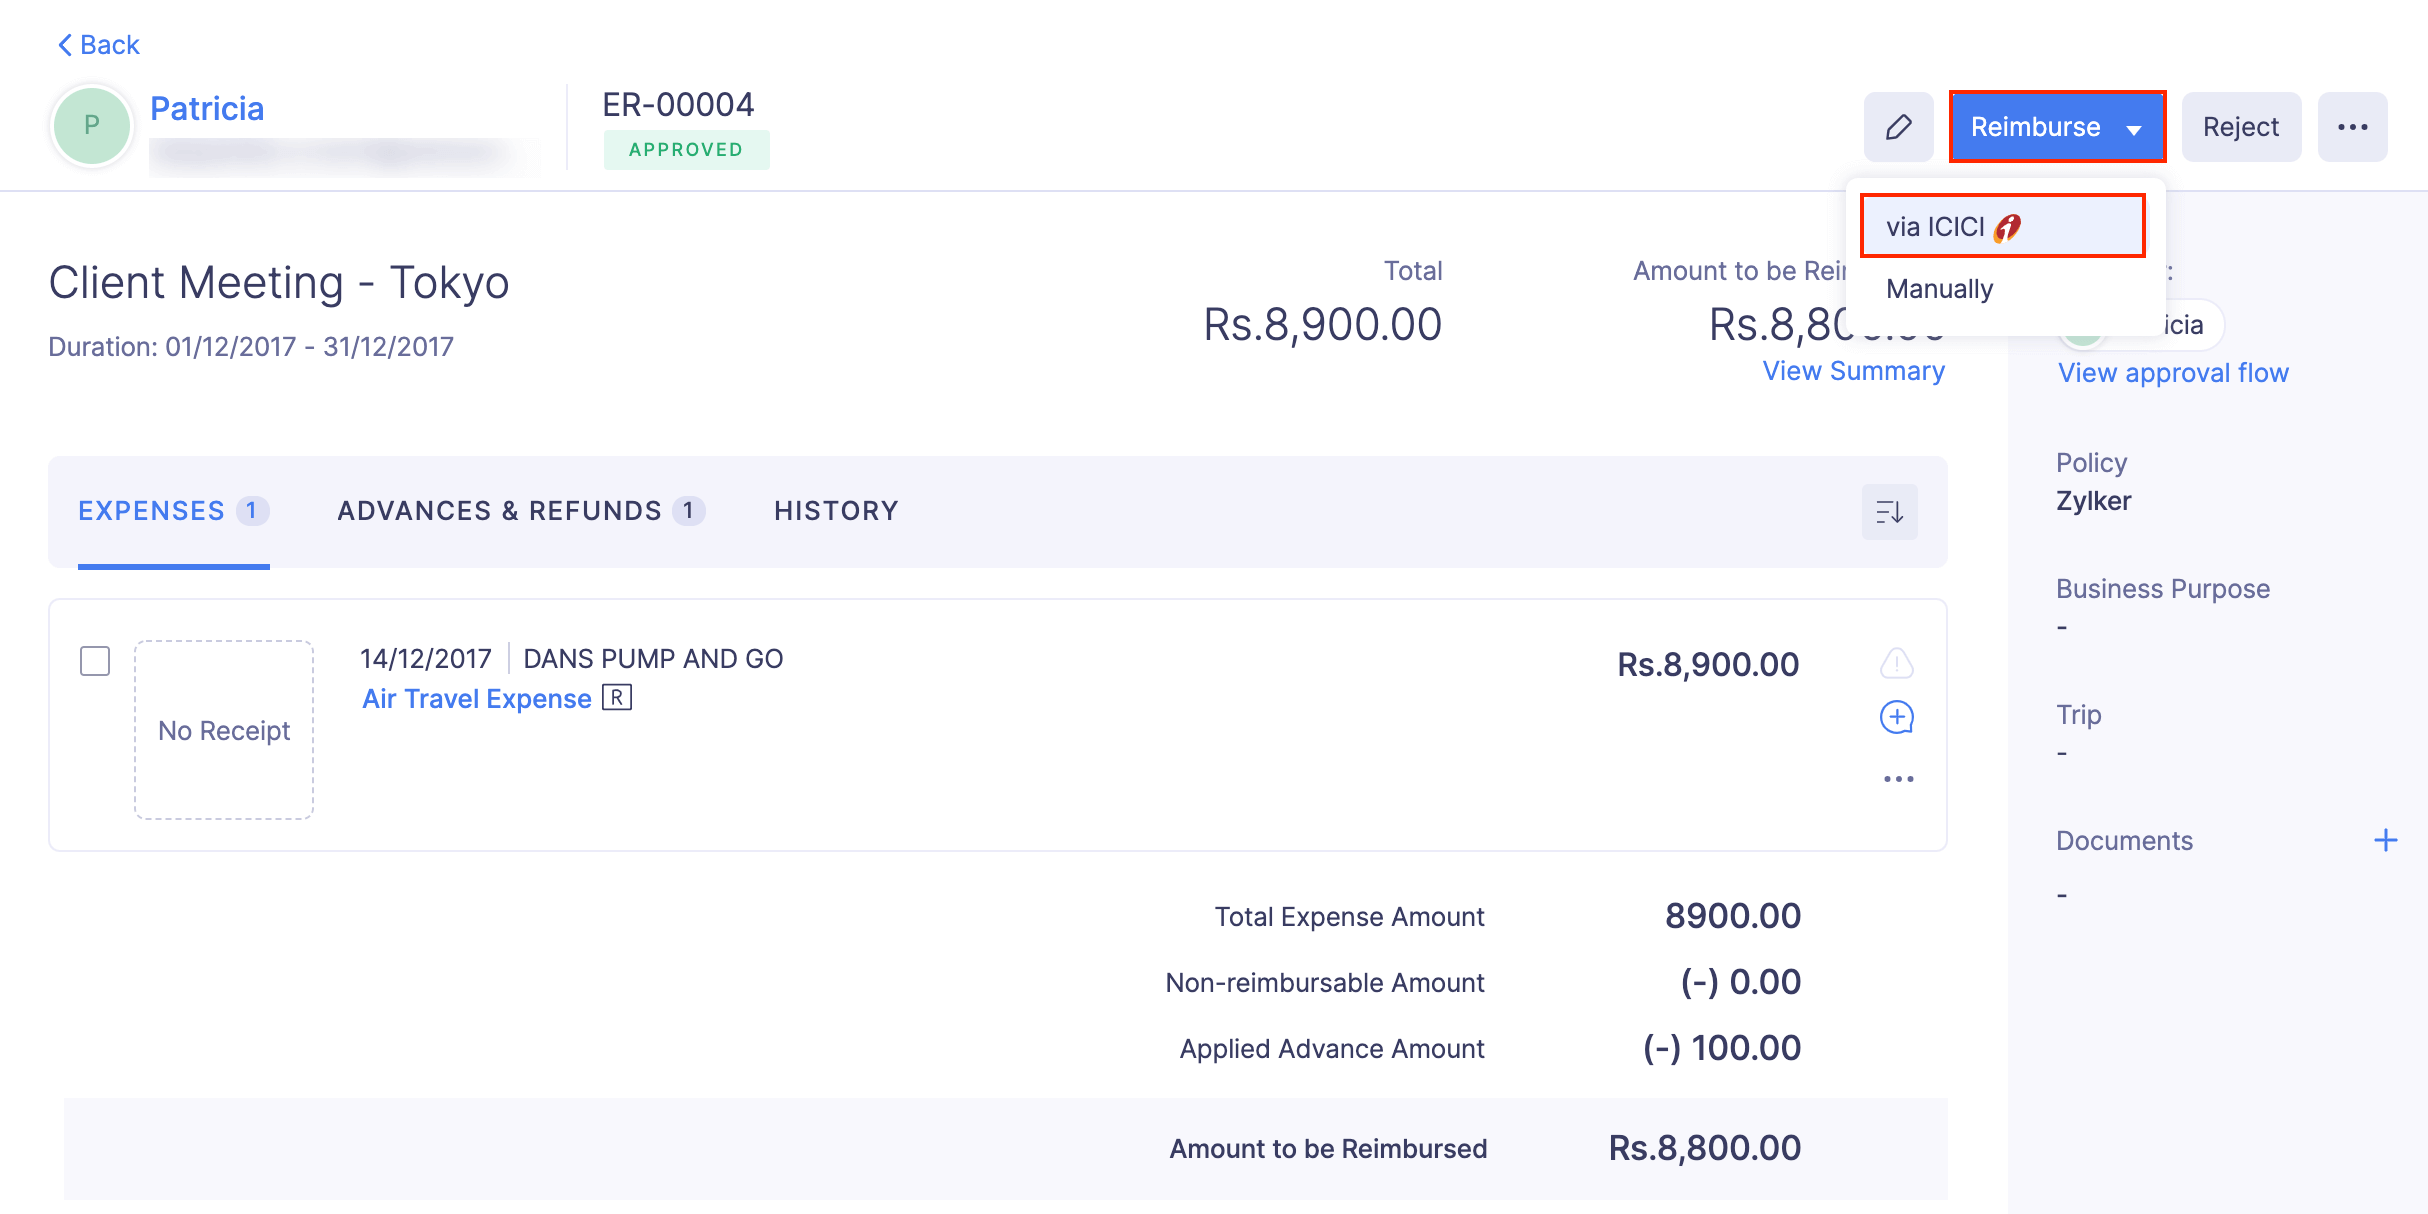
- Click the Reimburse dropdown and choose via ICICI.
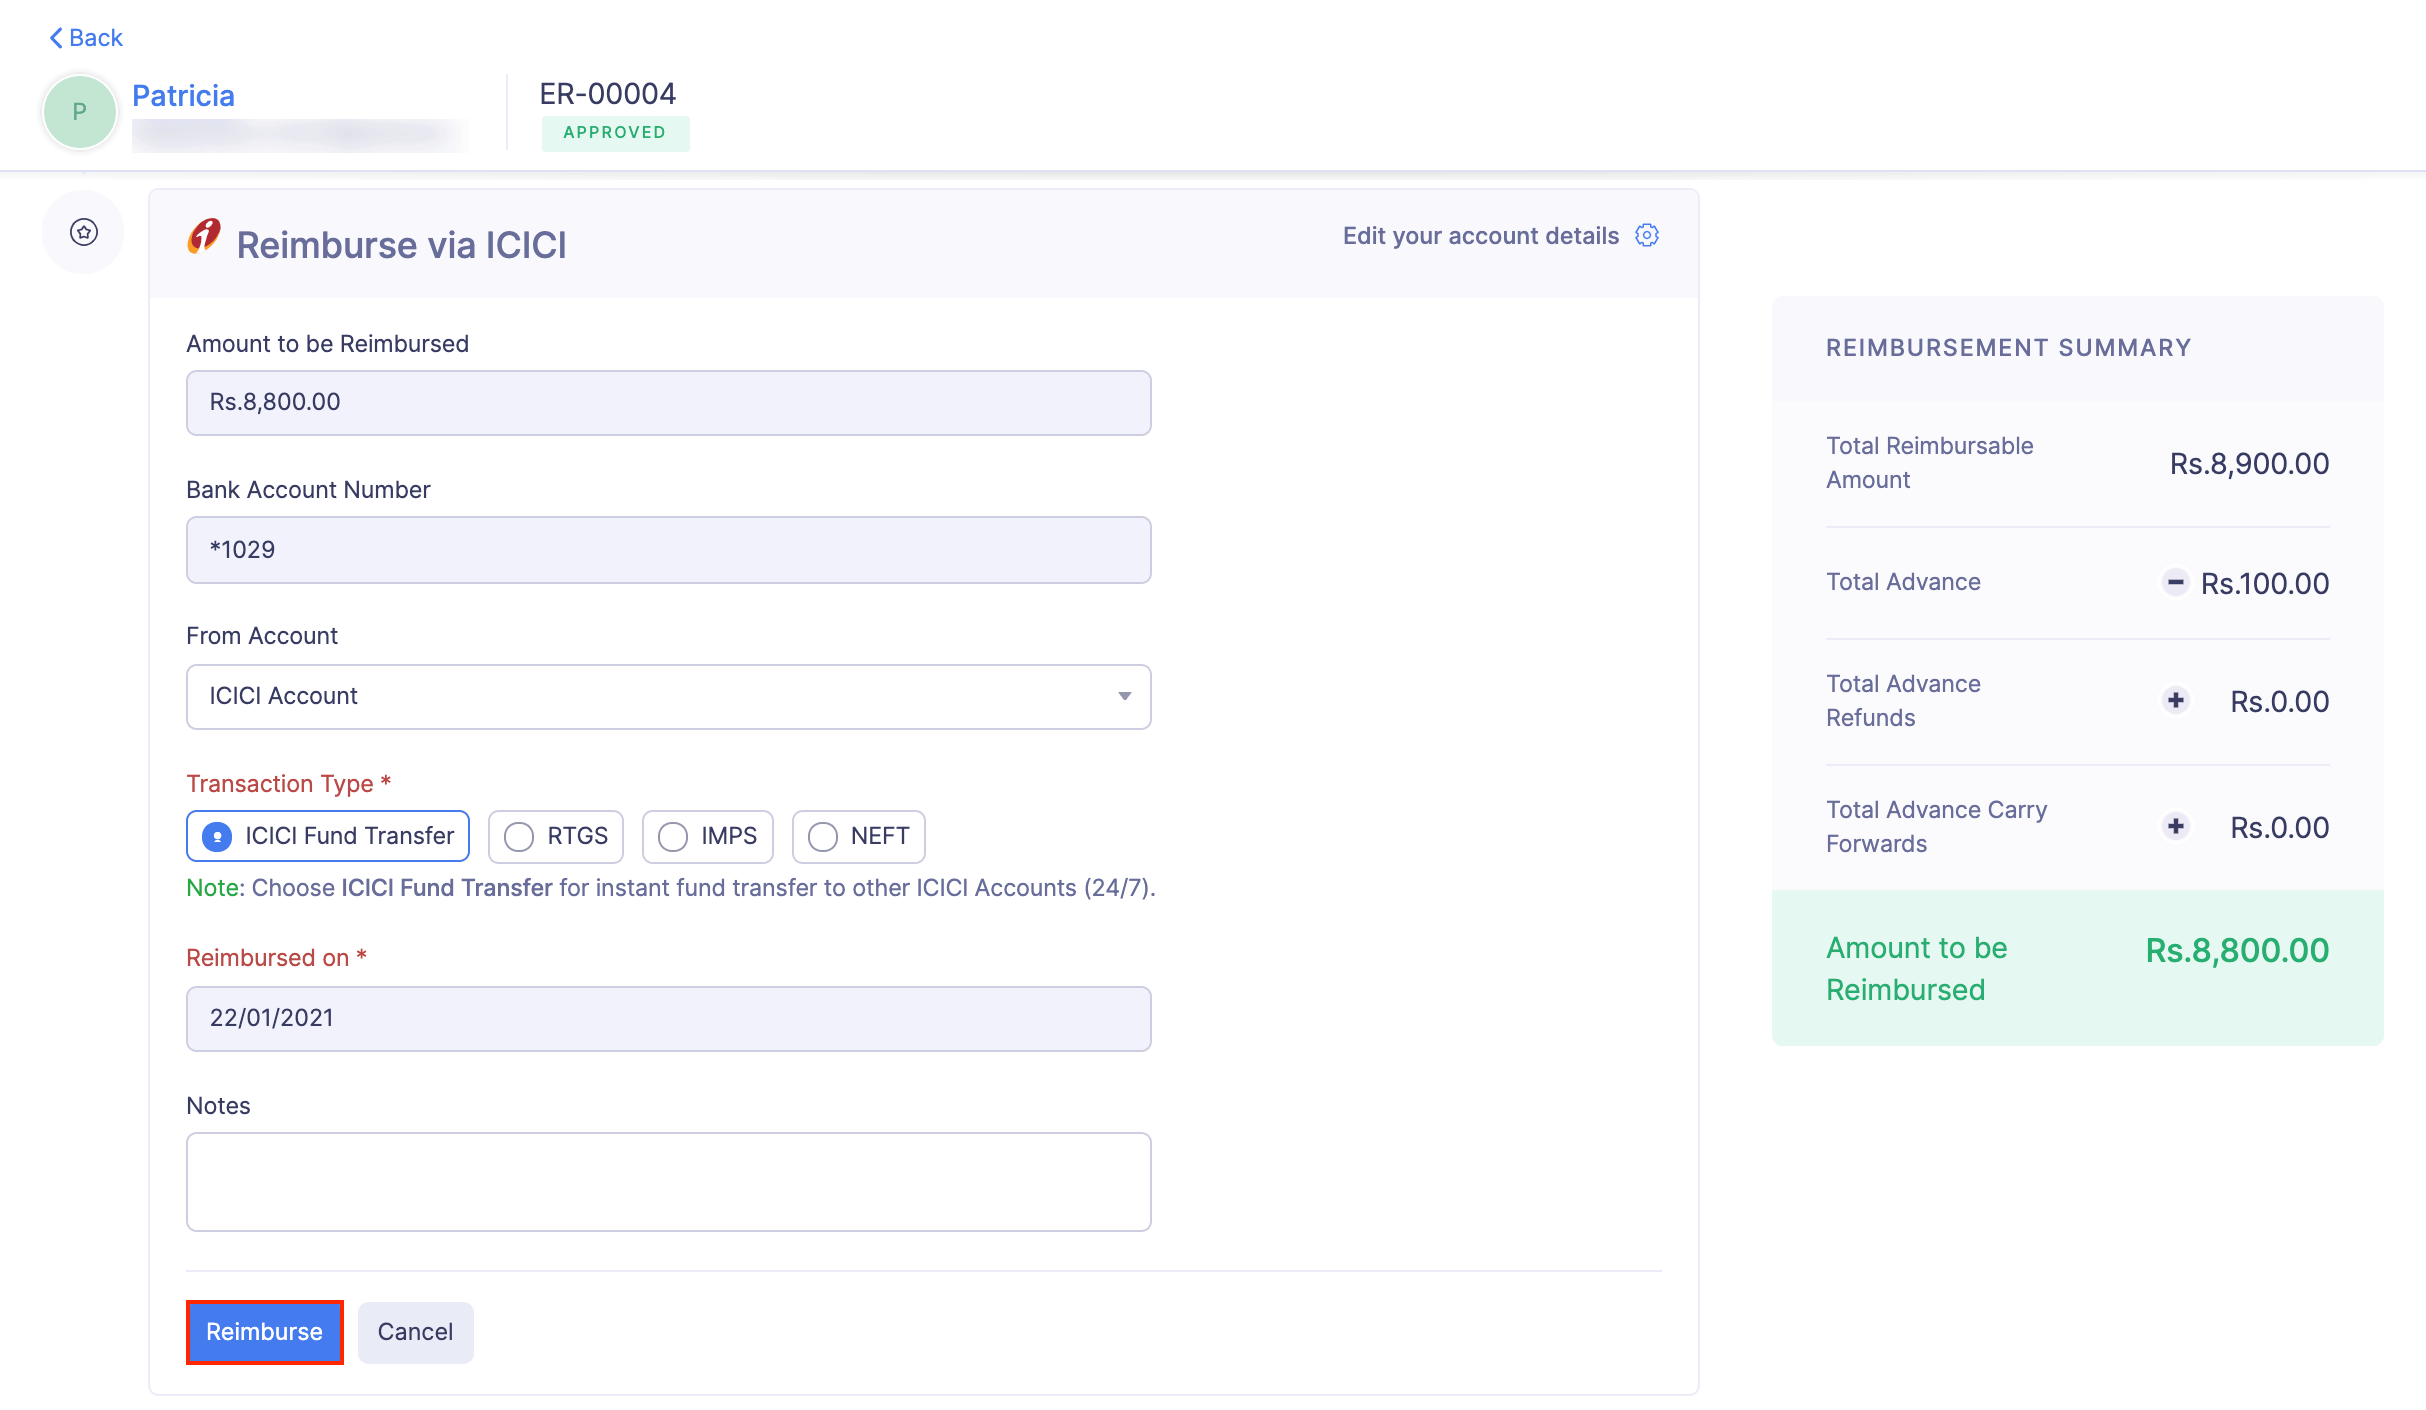
- Under the From Account dropdown, select the account from which you are reimbursing.
- Choose the Transaction Type (RTGS, NEFT, IMPS or ICICI Fund Transfer), and enter a note regarding the reimbursement, if required. If you’ve chosen NEFT, the amount will reflect in the employee’s account within the next 30 minutes. If you choose IMPS, ICICI Fund Transfer or RTGS, the funds will be transferred instantly. However, the reimbursements initiated via NEFT & RTGS during bank holidays and non-working hours of the bank have some limitations and may take longer than usual to reflect in the user’s account.
- Click Reimburse.
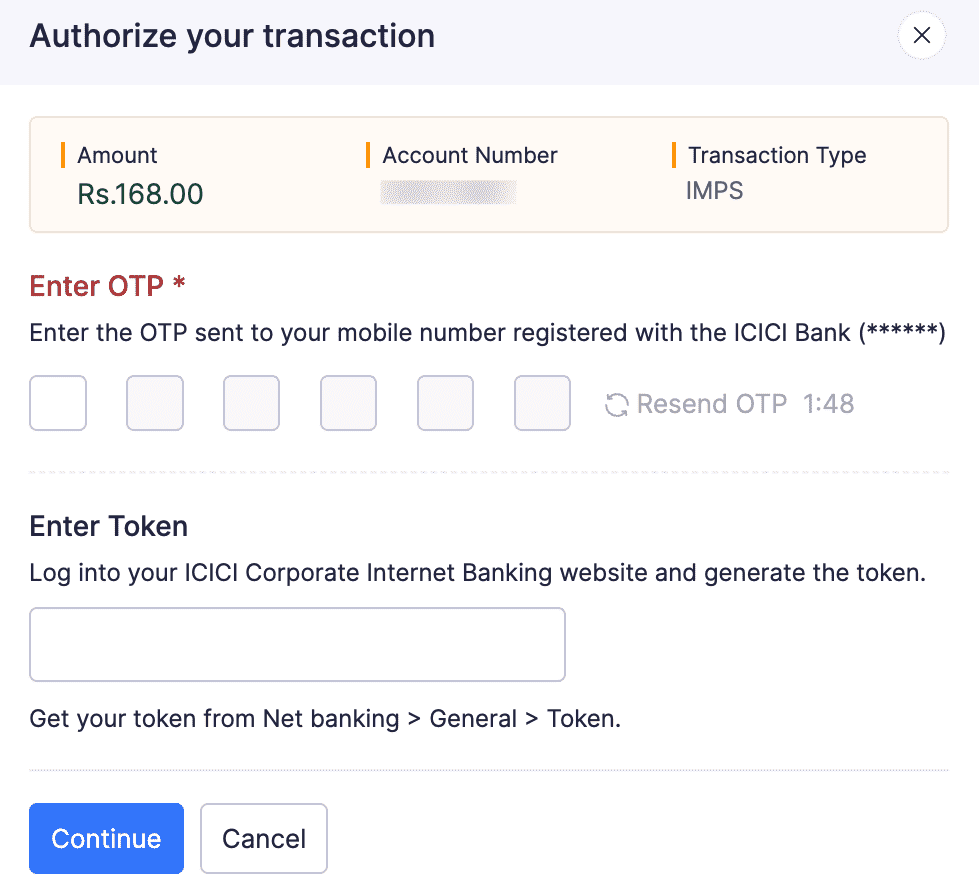
- In the pop-up that follows, enter the OTP sent to your registered phone number and your ICICI Bank Token.
Insight: ICICI Bank has introduced Tokens, a unique 4-8 digit number, used to initiate reimbursements securely through connected banking services. You can log in to your ICICI Corporate Internet Banking account and generate the token.
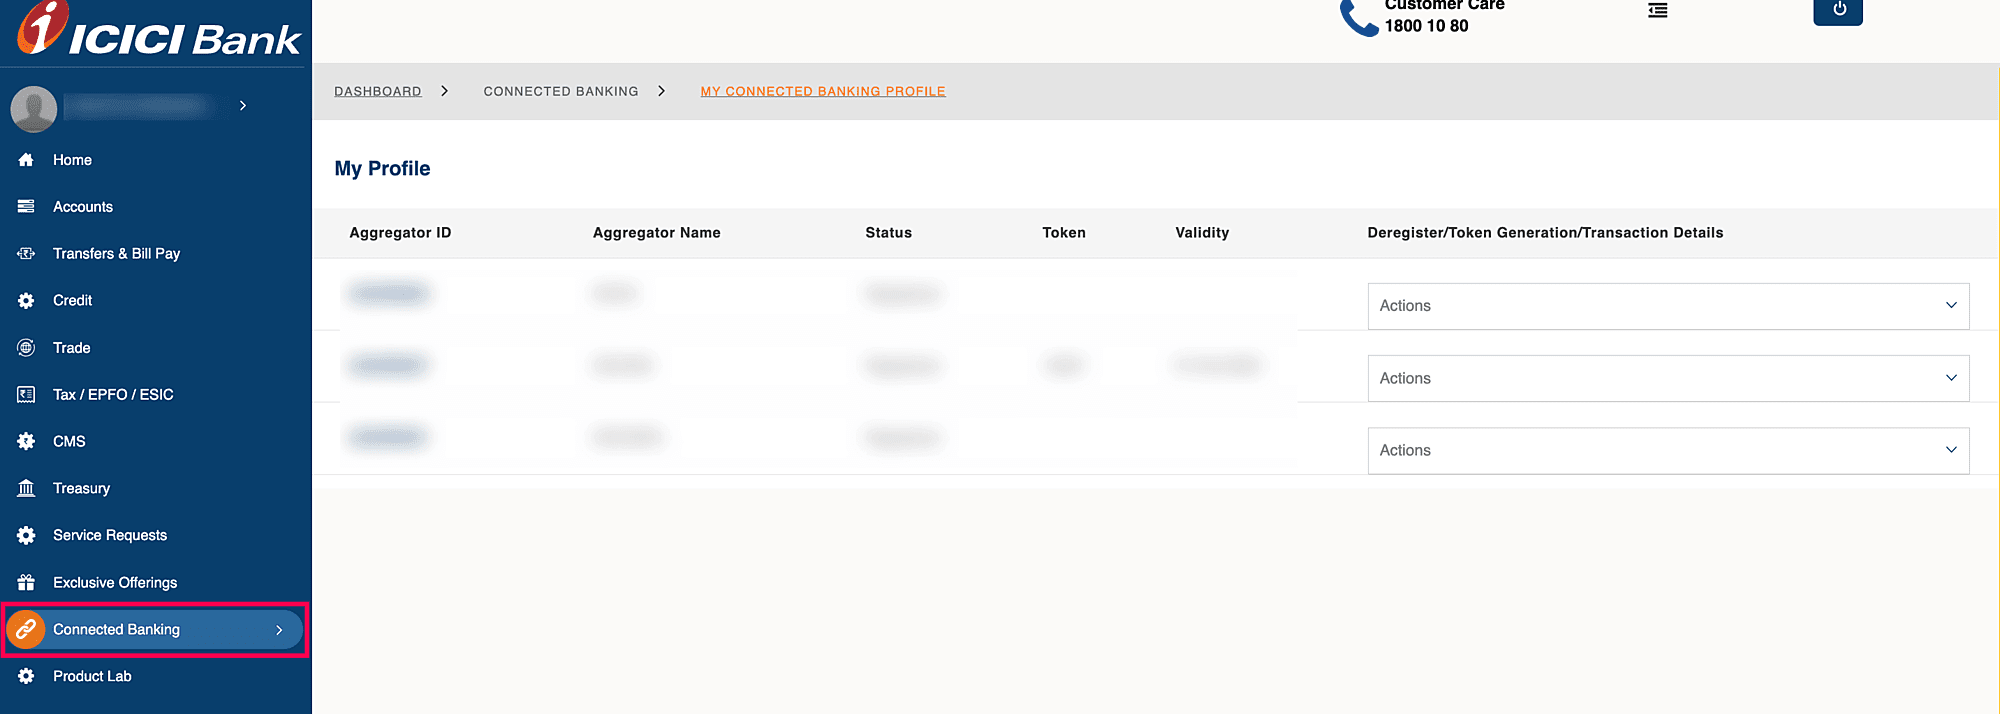
To generate a token and use it to make reimbursements in Zoho Expense, log in to your ICICI Corporate Internet Banking Portal.
- Go to the Connected Banking module in the left sidebar.
- Navigate to the Aggregator Name labelled as ZOHOIN/ZOHOSPL.
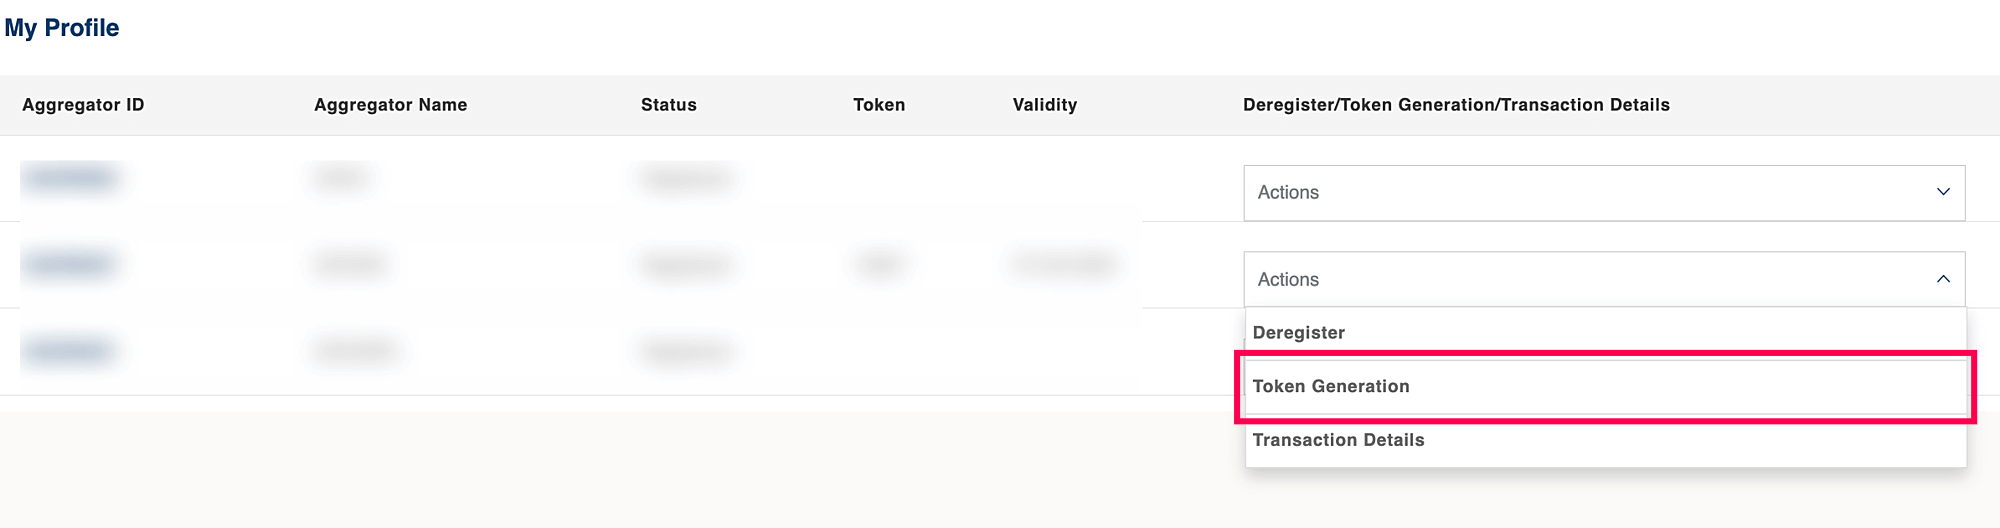
- In the Actions dropdown, select Token Generation.
- In the next page, enter the OTP sent to the registered phone number and click PROCEED FOR TOKEN GENERATION.
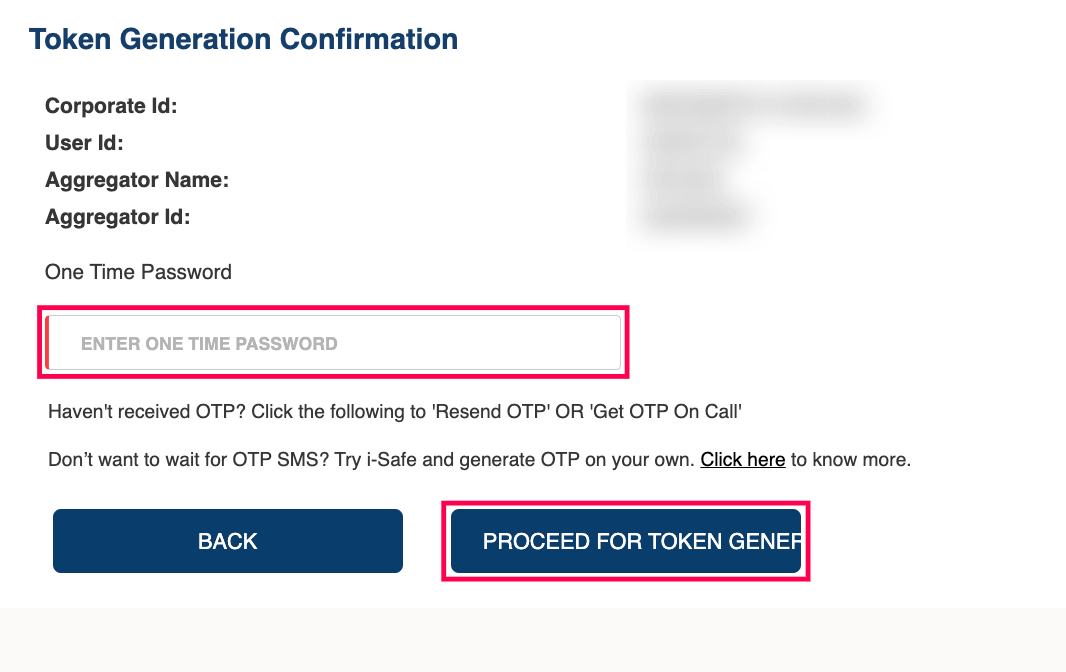
A new token for your account will be generated automatically.
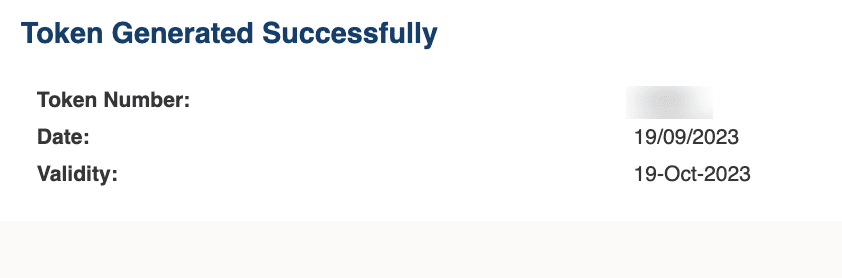
- Enter the token number generated in Zoho Expense while reimbursing through your ICICI Bank account and click Continue.
Note: Your ICICI Bank token will expires every 7 days. Follow the steps mentioned above to generate a new token in the CIB portal and enter it while initiating reimbursements through your ICICI Bank account in Zoho Expense.
The reimbursement will be reflected in the employee’s account depending upon the type of transaction you’ve chosen.
Note: If you have any queries regarding the ICICI bank integration, write to us at icici-support@zohofinance.com
Delete Integration
If you want to stop making reimbursements via your ICICI Bank account from Zoho Expense or change your account details, you can delete the integration.
Warning: Deleting the integration in Zoho Expense will delete it from other integrated Zoho Finance applications as well. Once deleted, you will not be able to track the status of any uncleared transactions.
To delete the integration:
Note: Delete is available only when the ICICI Bank integration status is Active or Rejected.
- Navigate to the Admin View.
- Go to Settings on the left sidebar.
- Go to Online Reimbursements under Integrations.
- Click ICICI.
- Click Delete next to ICICI.
- In the pop-up, read the terms and mark the checkbox I have read the information mentioned above and still wish to delete the integration.
- Click Delete.
Note: Deleting your Zoho Expense organization or removing the user who set up the integration, will delete the integration.
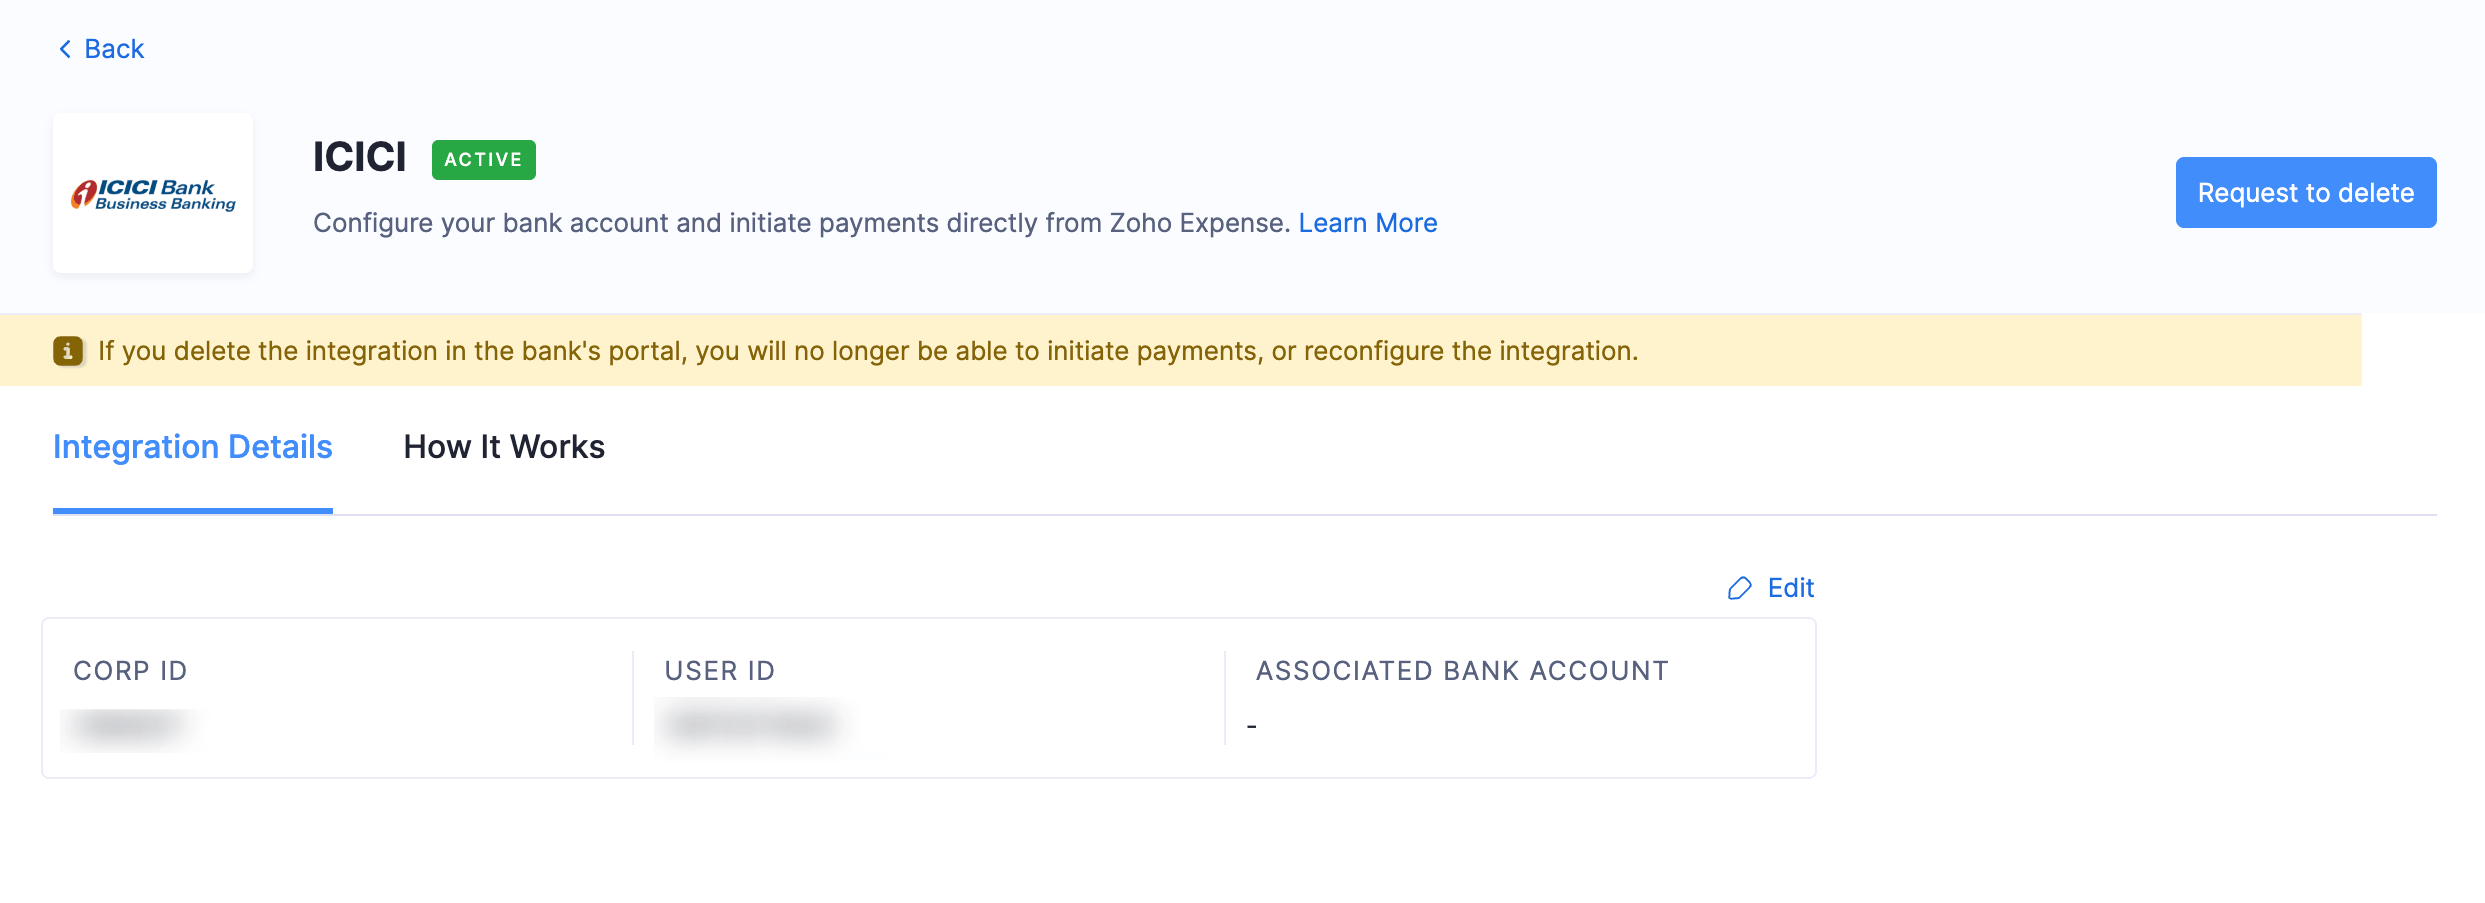
To delete the ICICI Bank integration in Initiated or Pending status, click Request to Delete and submit the support form. Our support team will review your request and respond shortly.
 Yes
No
Yes
No
Thank you for your feedback!