
Add Transactions
If you are unable to fetch feeds from your bank due to various reasons, you can record manual entries and import transactions for your offline or past bank transactions of your bank or credit card accounts.
Manually Add Transactions
To record manual entries for your offline transactions for your bank or credit card accounts,
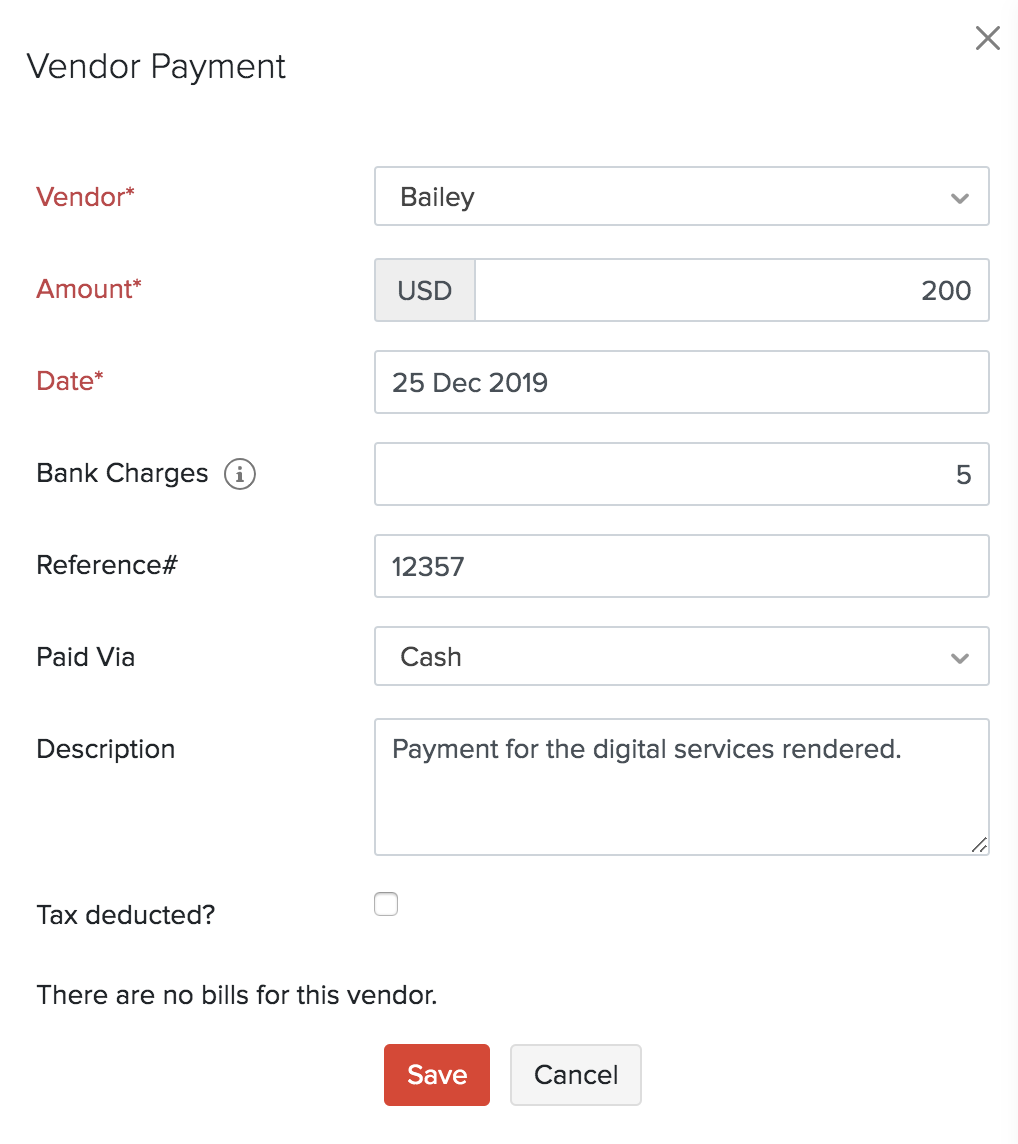
Go to the Banking module and select the account in which you would like to record a transaction. Select the desired transaction for which you would like to manually record in your account from the Add Transaction drop down.
If you had to pay your vendors, transfer money, pay for your purchases, record expenses and other similar transactions, you can choose an account from the Money Out tab.
Just like the way expenses are recorded, the money that your customers pay such as the sales, interests, refunds on expenses, deposits and other incomes can be recorded manually from the options given under the Money In tab from the Transactions drop down.
- Once the transactions are recorded, it will be labelled as Manually Added.
Pro Tip: You can add additional details about your transaction by attaching a document.
To attach a document, click Upload file.
Note: You can upload a maximum of 5 files, 5MB each.
Import Bank Statements
You can import bank statements for your manually created bank and credit card accounts. The bank statements you import can be in CSV, TSV, OFX, QIF, CAMT.053, CAMT.054, MT940 or PDF formats.
To import bank statements in CSV, TSV, OFX, QIF, CAMT.053, CAMT.054, or MT940 formats:
- Go to Banking on the left sidebar.
- Select a bank or a credit account.
- Click the Gear icon in the top right corner and select Import Statement.
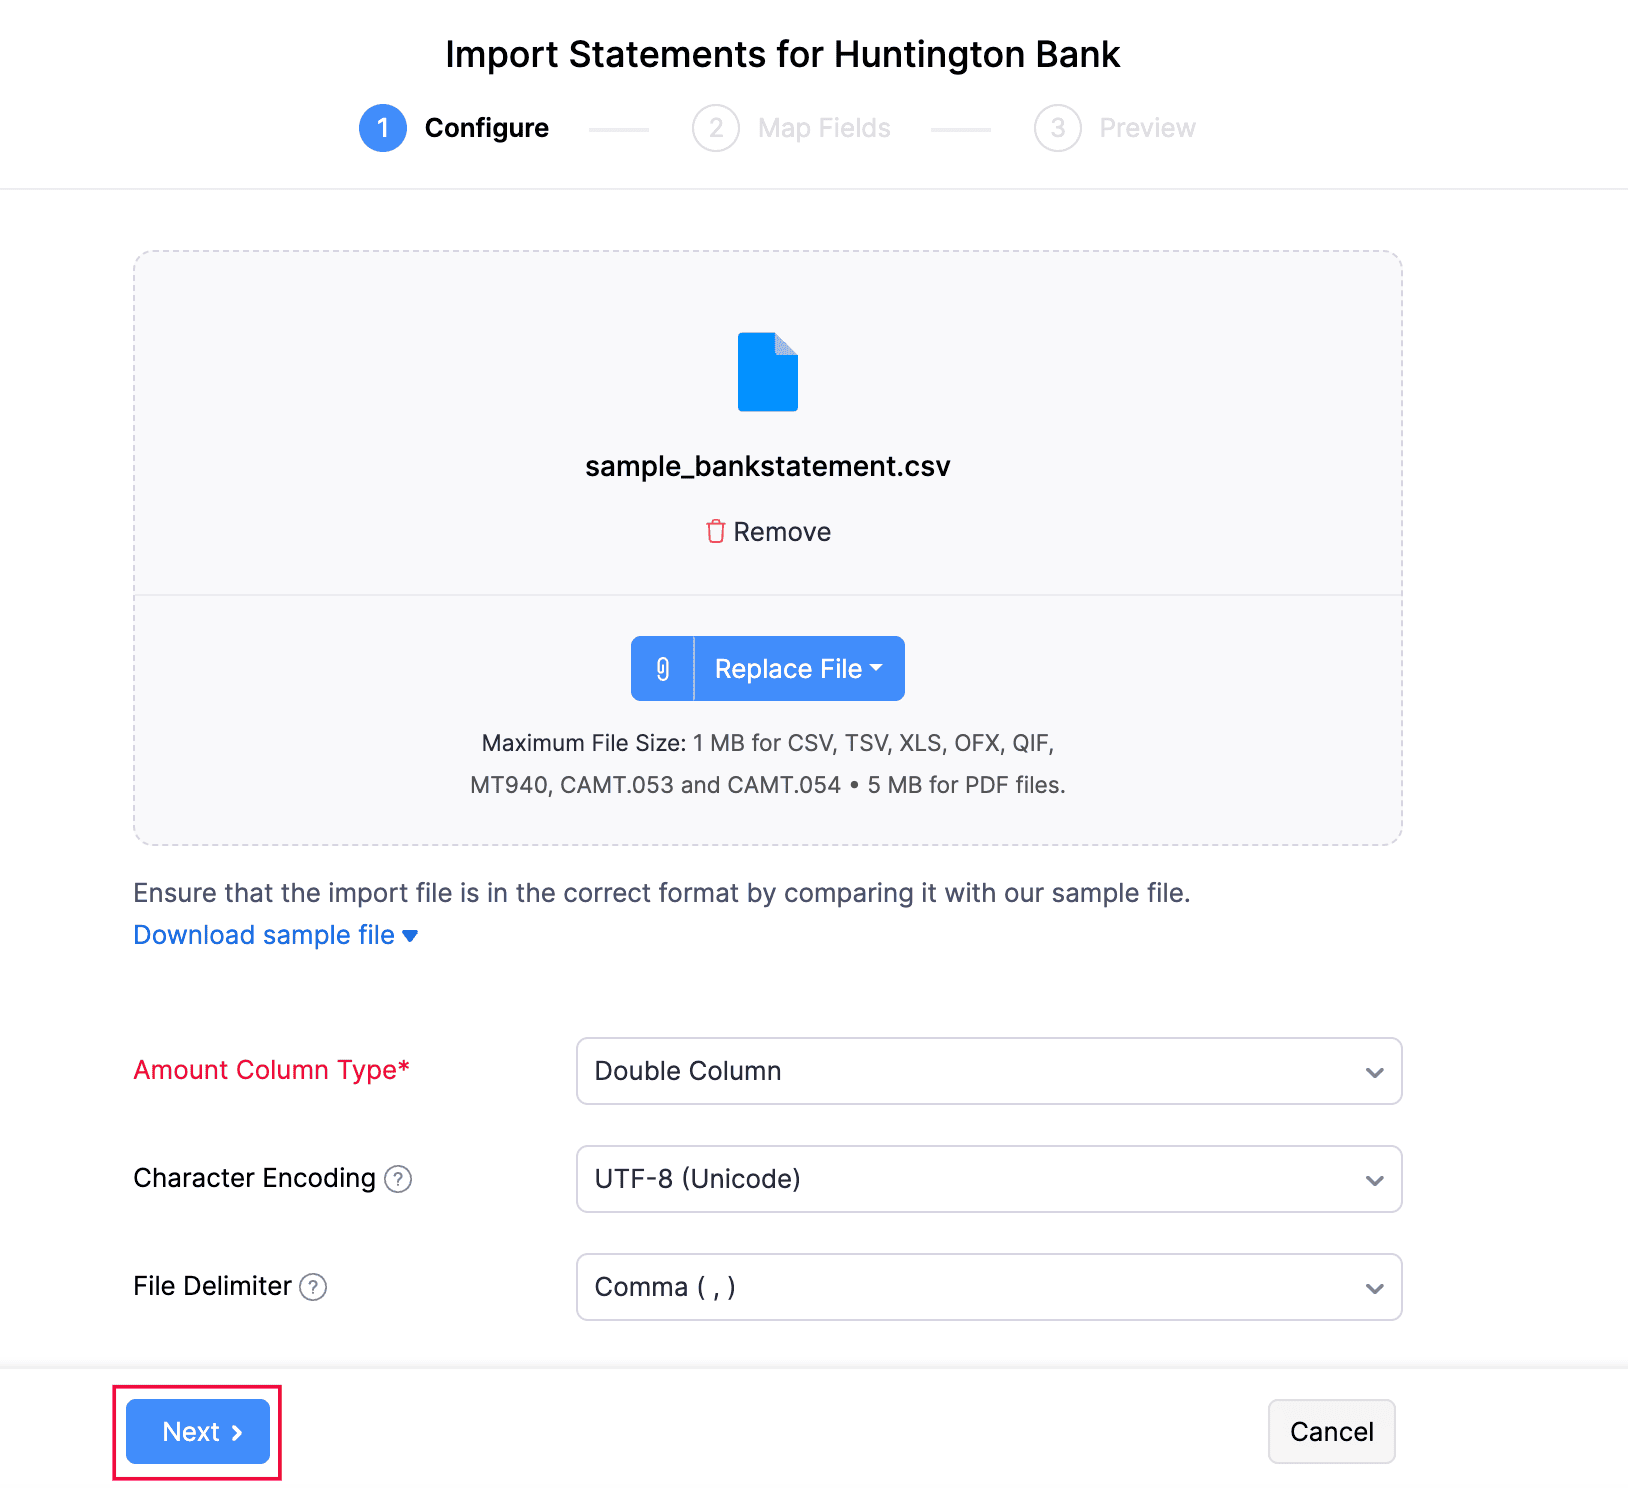
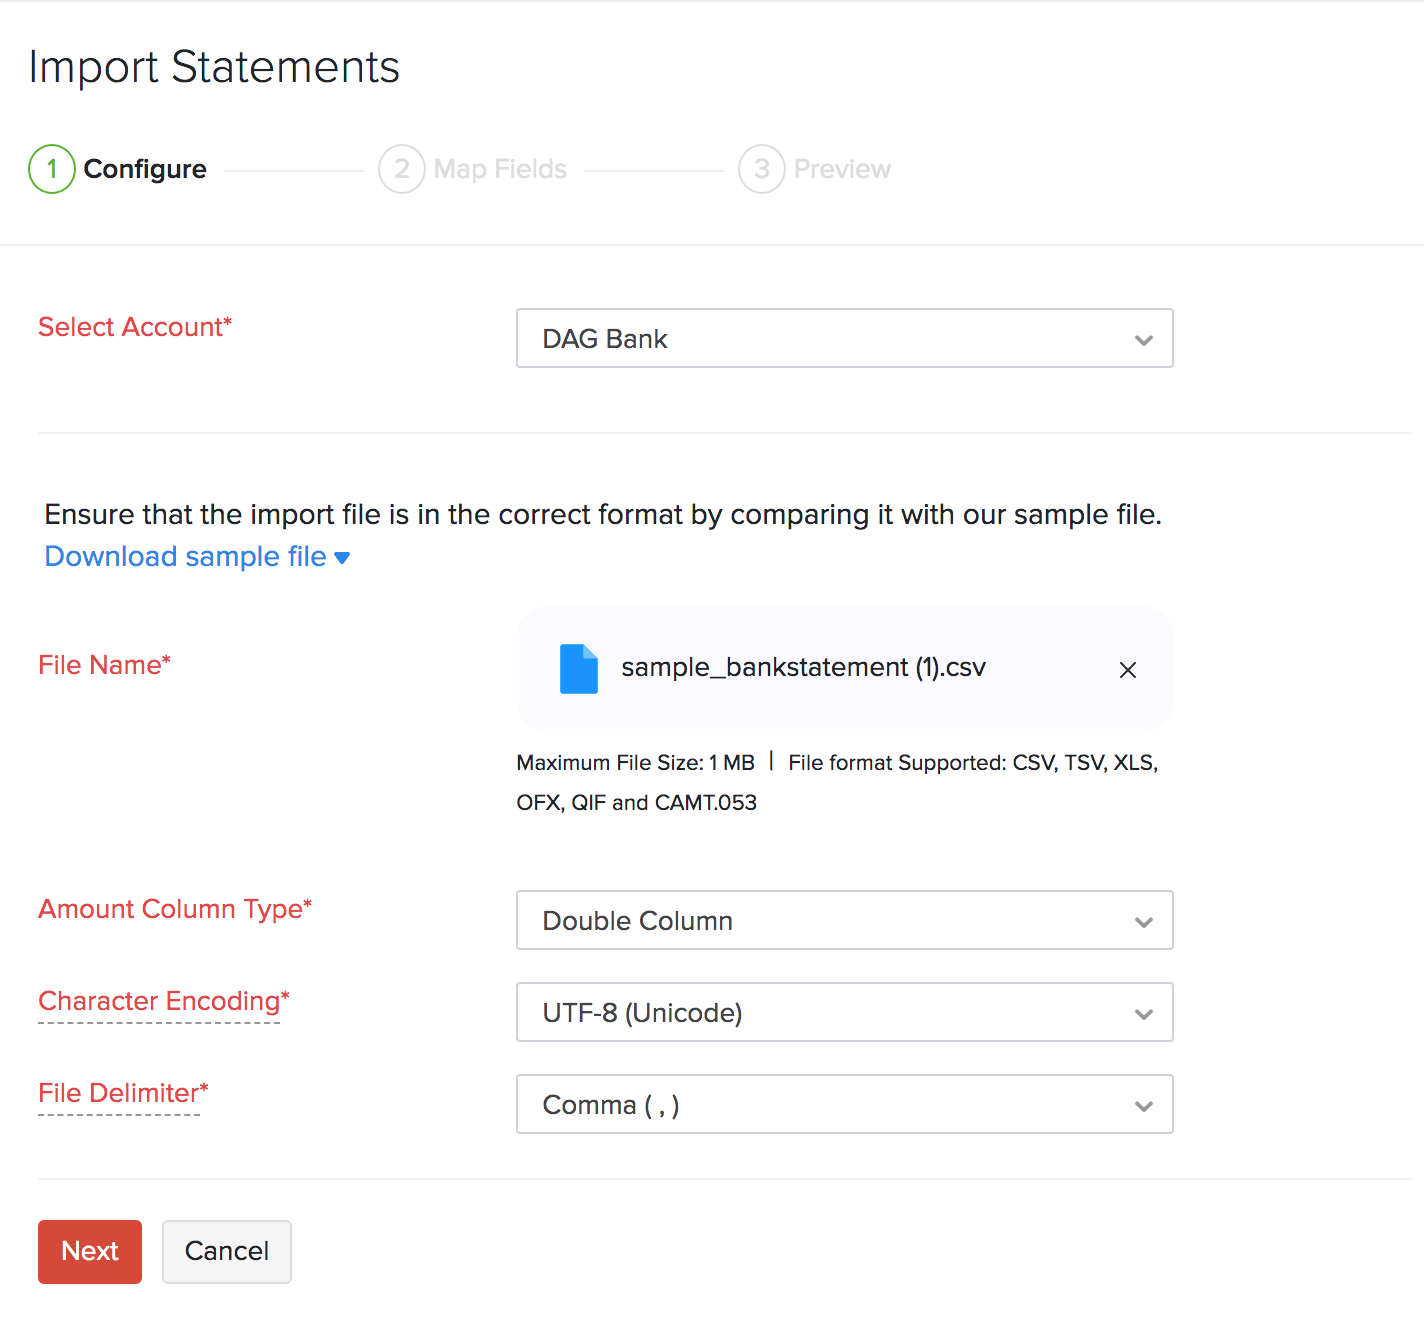
- Click the Choose File dropdown and select Choose File from Desktop to upload a file from your desktop or select Choose File from Documents to choose a file from Documents.
- Select the Amount Column Type:
- Select Double Column if your import file has two separate columns for deposits and withdrawals.
- Select Single Column and Amount Type if your import file has one column indicating whether the transaction is a debit (withdrawal) or credit (deposit), and a separate column for the amount.
- Select Single Column with Negative Values if your import file has one column where positive values indicate deposits and negative values indicate withdrawals.
- Select the Character Encoding and File Delimiter.
Pro tip: To ensure that you’ve selected the correct Character Encoding, check your import statement file.
- Click Next.
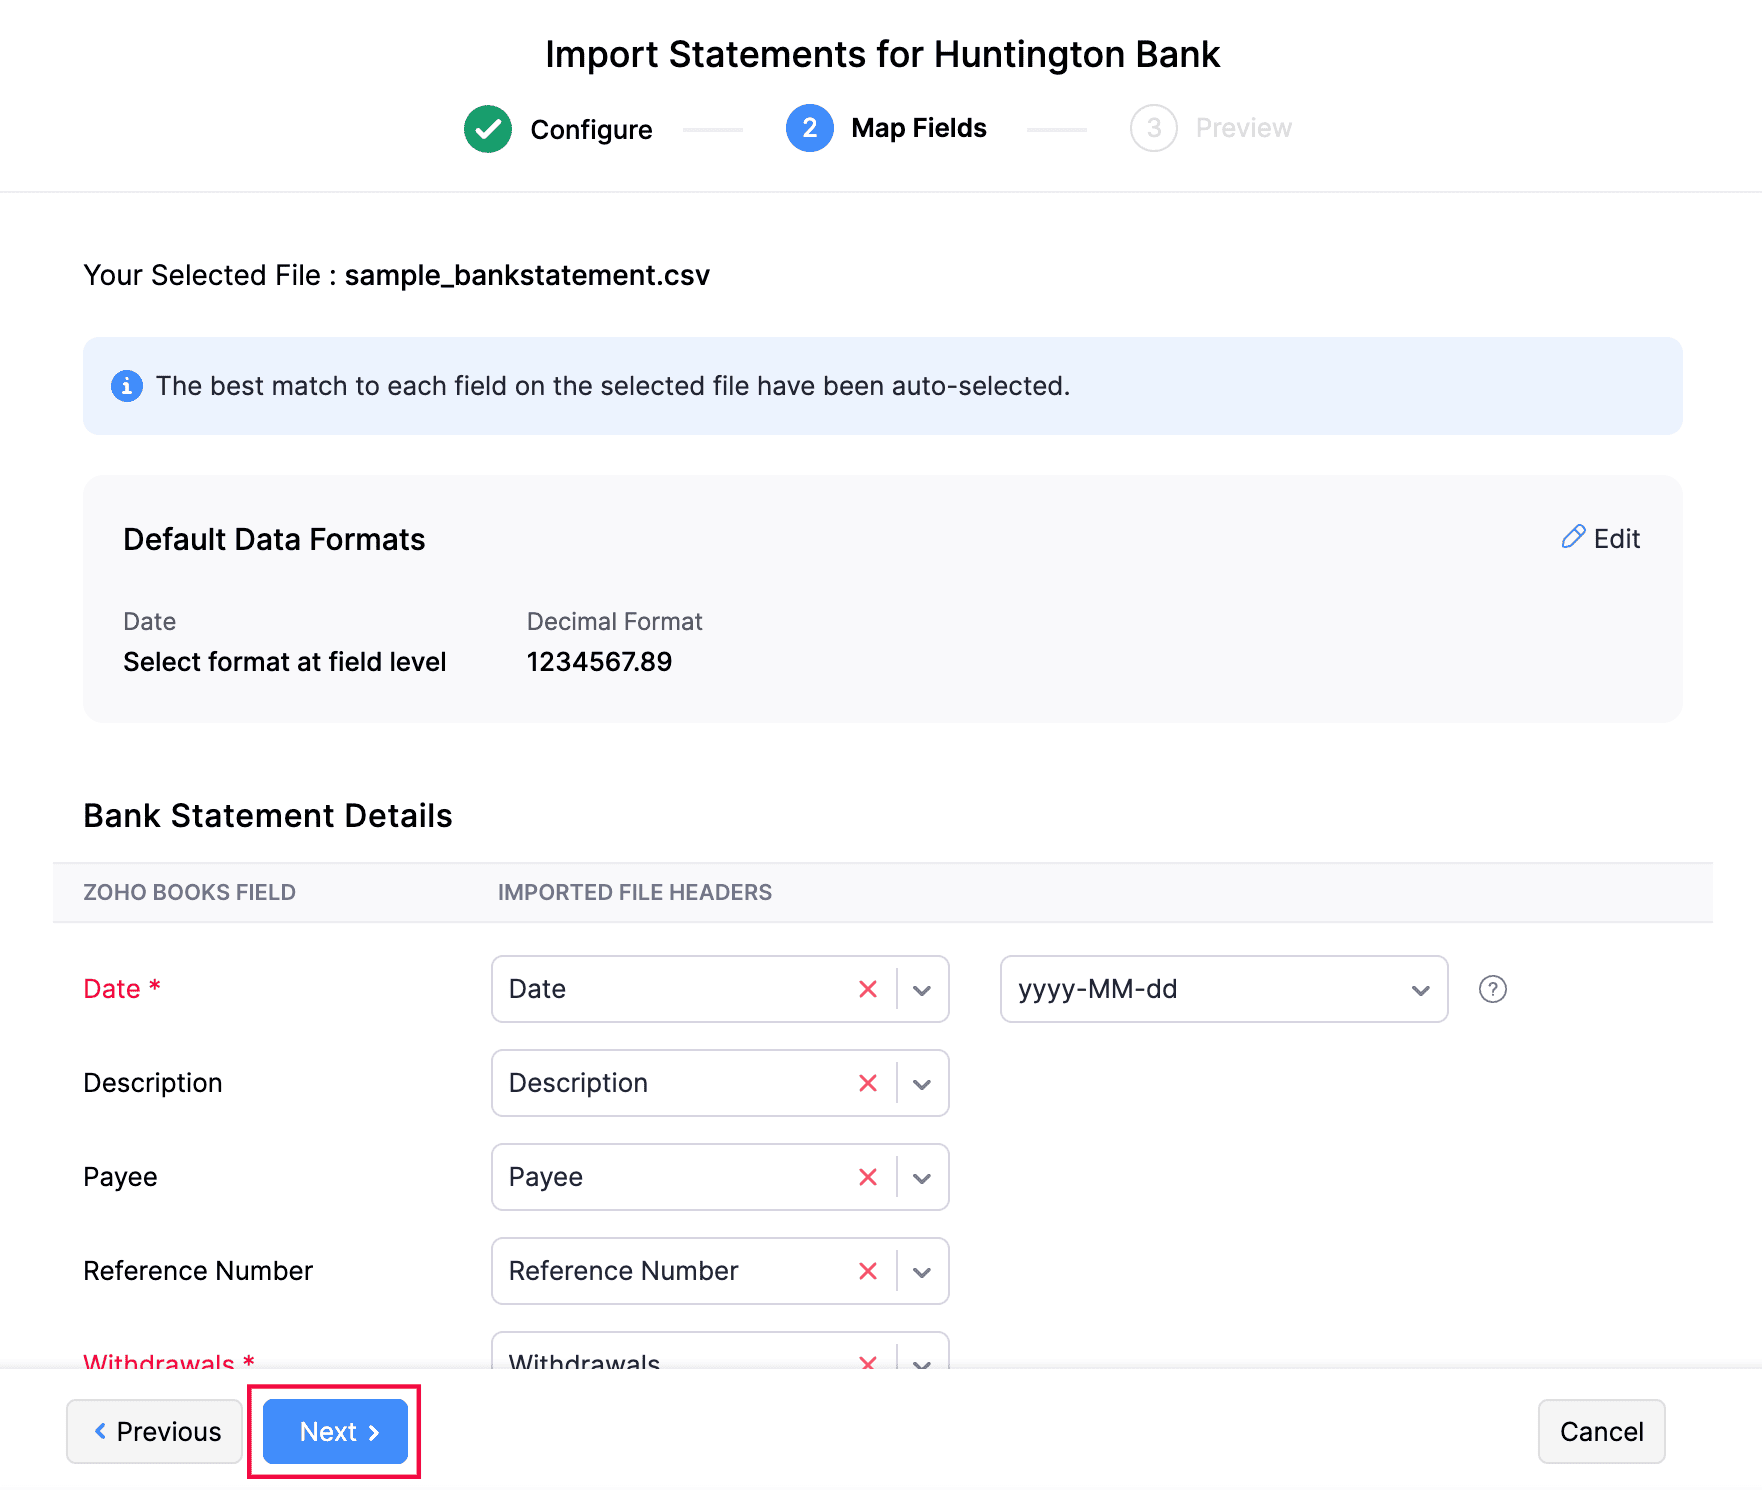
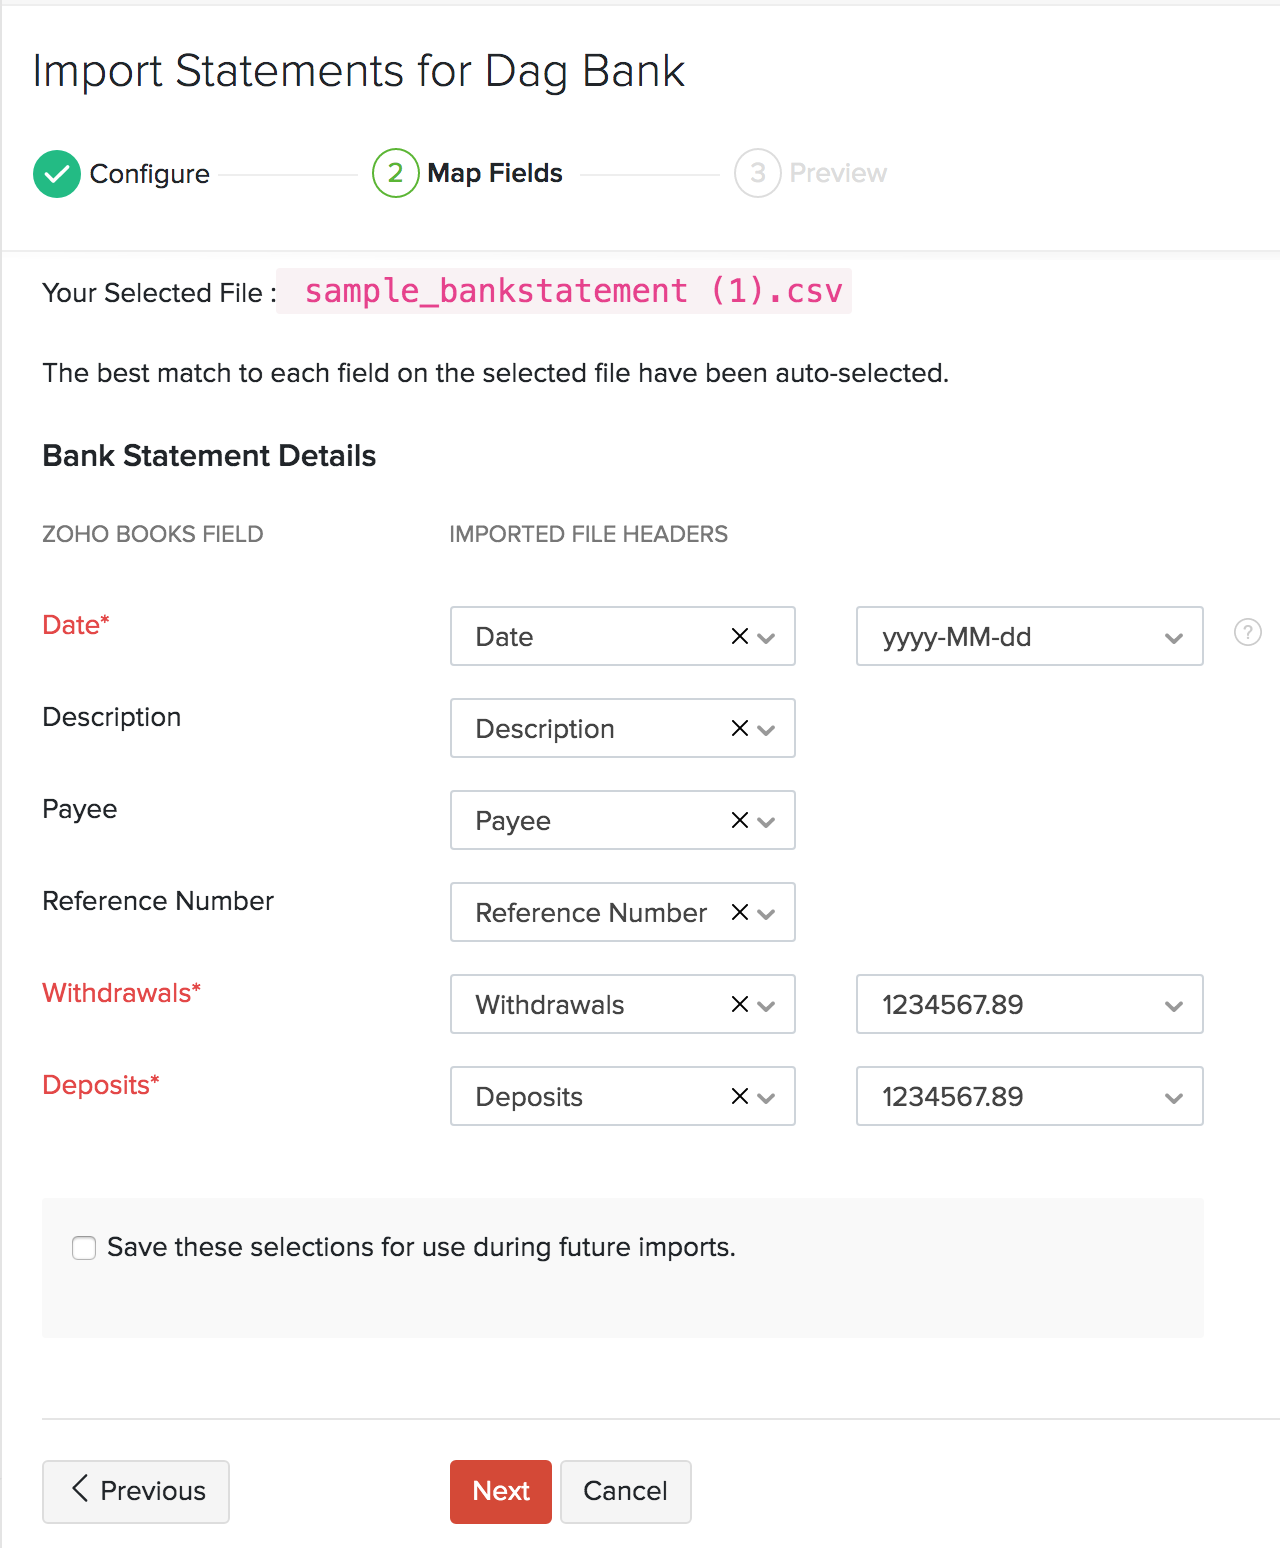
You will be redirected to the Map Fields tab, where you can map the imported file headers to the fields in Zoho Books. The best match for each field in the selected file will be auto-selected.
Pro tip: You can save your preferences for future references by selecting the Save these selections for use during future imports option.
- Click Next.
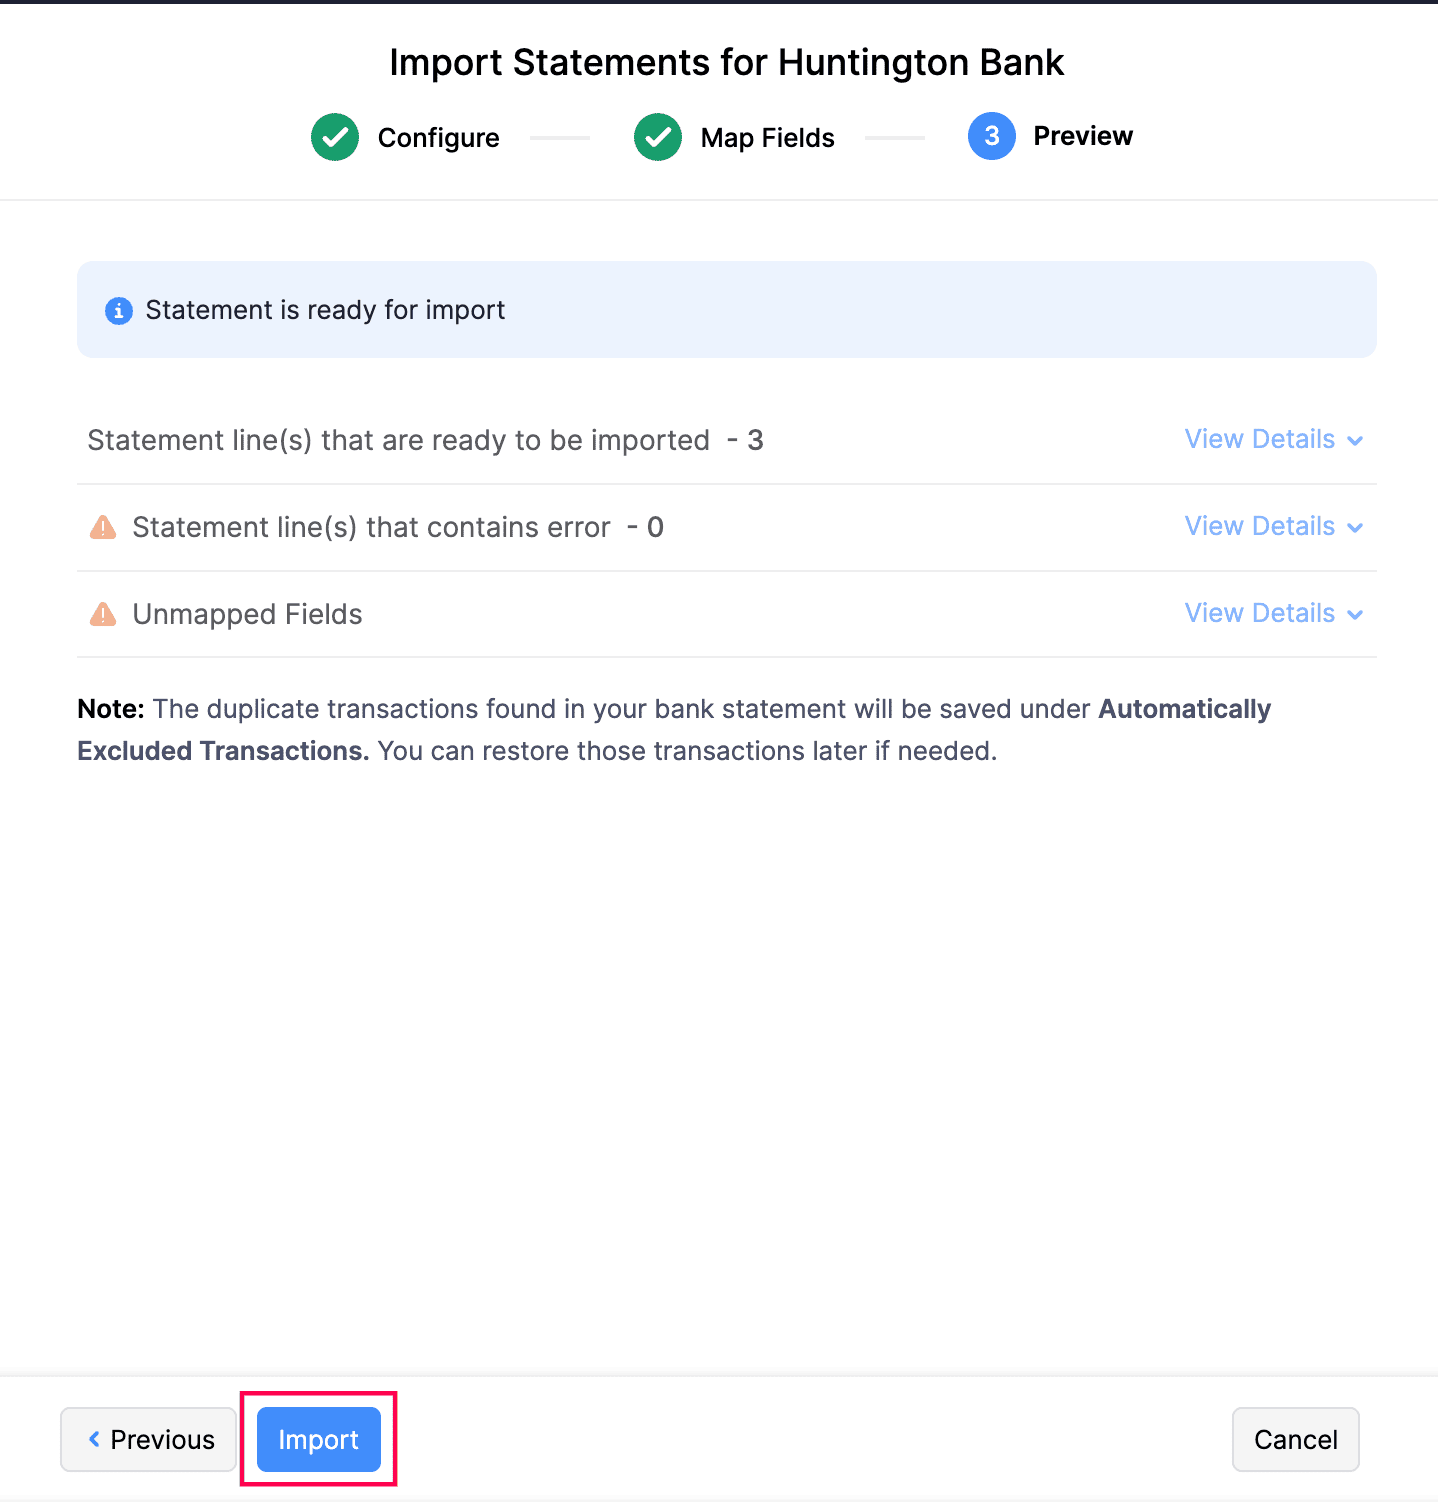
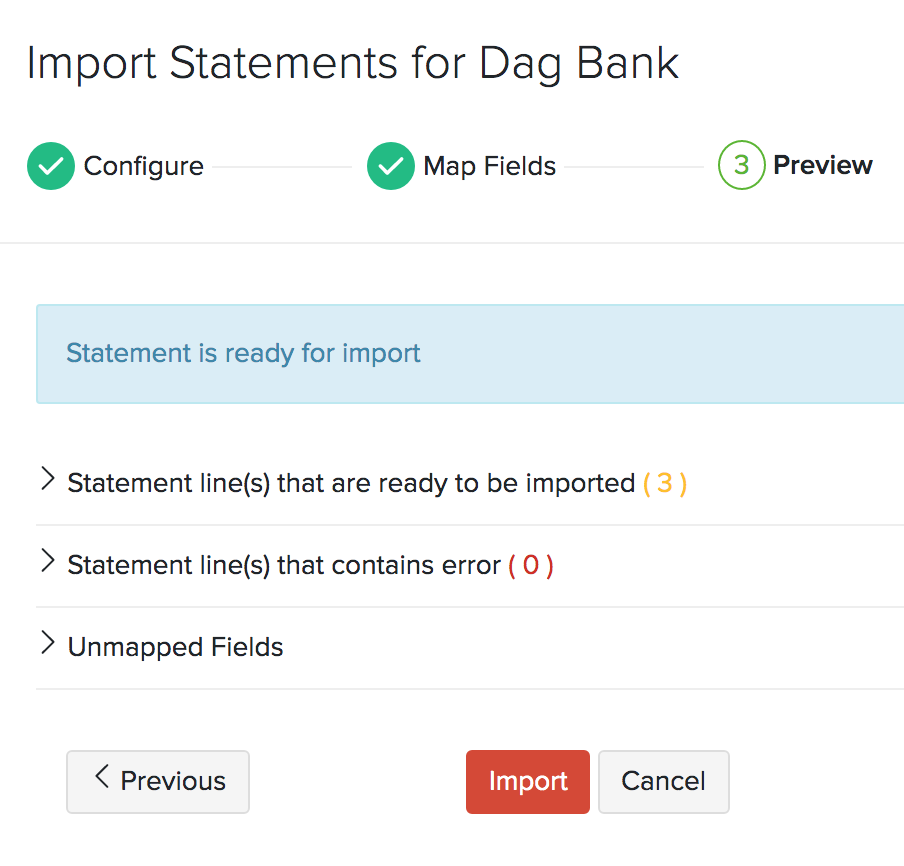
You will be redirected to the Preview tab, where you can review your import details and check for any errors or unmapped fields. If you want to make any changes, click Previous to edit your import preferences.
- Click Import.
To import bank statements in PDF format:
Note: You can import bank statements in PDF format from the following banks and credit card providers: NOVO Bank, First Internet Bank, Chase Bank, Huntington Bank, Dollar Bank, TD Bank, First National Bank, Costco Anywhere Visa Card, American Express Card, Bank of America (Bank), Bank of America (credit card), Regions Bank, Capstar Bank, Southwest Airlines Credit Card, Truist Bank, Chase Card, Chase Marriott, and Capital One Credit Card.
- Go to Banking on the left sidebar.
- Select a bank or a credit account.
- Click the Gear icon in the top right corner and select Import Statement from the dropdown.
- Click the Choose File dropdown and select Choose File from Desktop to upload a file from your desktop or select Choose File from Documents to choose a file from Documents.
- Select the Bank Name.
- If your file is password protected, check the option This file is password protected and enter the Password.
- click Import.
You will be redirected to the Preview tab, where you can review your import details and check for any errors or unmapped fields. If you want to make any changes, click Previous to edit your import preferences.
- Click Import.

The bank statement will be imported.
Auto-Forward Bank Statements
If you have enabled auto-forward bank statements, you will be able to forward the emails with attachments from your bank to Zoho Books automatically. To add the forwarded statements to the relevant bank:
- Go to Banking.
- Click Bank Statement in the top right corner.

- The forwarded statements will be displayed under Bank Statements From Inbox.
- Click Add to Bank.
If the chosen file is of the CSV, TSV, OFX, QIF, CAMT.053 formats, you will be redirected to the Import Statements page in the Banking module. Here’s how you can add them to your bank.
- Select the bank account to add the statement.
- The file will be pre-populated.
- Select the Amount Column Type from the drop-down:
- Select Double Column if your import file has two different columns for deposits and withdrawals.
- Select Single Column and Amount Type if your import file has a single column indicating a debit (withdrawal) or a credit (deposit) transaction and a separate column for the amount.
- Select Single Column with Negative Values if your import file has just one column where positive values indicate deposits and negative values indicate withdrawals.
- Select the Character Encoding and File Delimiter and click Next.
Insight: Ensure your bank supports statement forwarding via email in CSV, XLS, TSV, OFX, QIF or CAMT.053 formats.
Match the fields with the Import File Headers and hit Next.
Pro Tip: You can save your preferences for future references by selecting the Save these selections for use during future reference option.
You’ll be able to preview your import details where you can check for your errors and unmapped fields. If you want to make any changes, you can click Previous to edit your import preferences.
- Click Import.
Undo Last Import
If you’ve uploaded the wrong bank/credit card statement or uploaded the same statement twice , you can undo your last import.
- Click the Gear icon on the top right corner and click Undo Last Import.
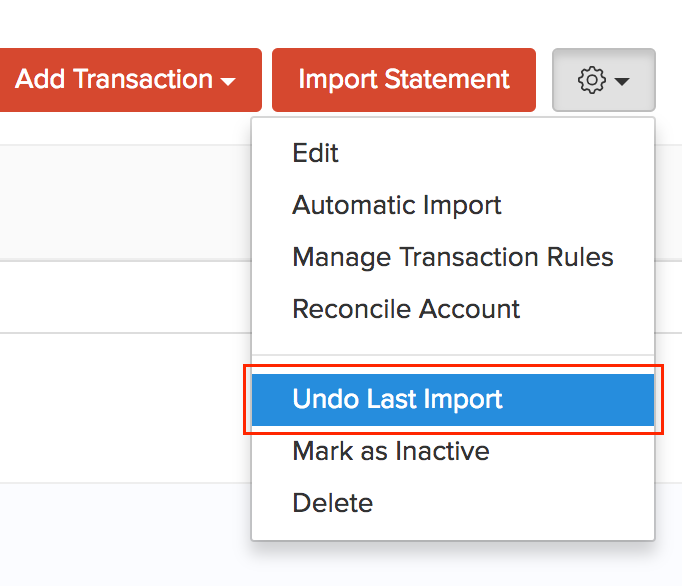
After that, you’ll be able to preview the transactions that are going to be deleted before you undo your last import.
- Click Undo Import.
Next >
Related >
 Yes
No
Yes
No
Thank you for your feedback!