
Creating Links and Getting Paid


Zoho Payments allows you to create payment links quickly with just a few clicks. Once created, you can share them with your customers to collect payments. You can also track the payment status of each link in real time from the Payment Links module.
Prerequisites: Generate an API Key from Developer Space to securely receive payments from customers.
Create Payment Links
Whether you’re collecting a single payment or billing many customers at once, Zoho Payments lets you create payment links in the way that suits you best. There are two ways to create payment links:
- Generate Payment Links: Create a single payment link quickly by entering the payment details.
- Import Payment Links: Create multiple payment links at once by importing a CSV, XLS, or XLSX file.
Generate Payment Links
You can generate a payment link and start collecting payments from your customers instantly. When a payment link is generated, it is automatically marked as Active.
To generate a payment link:
- Go to the Payment Links module and click + New Payment Link.
- Click the Currency dropdown (defaulted to USD) under Payment Amount and select your customer’s currency. You can scroll through the list or use the search bar to find the right one.
- Enter the necessary details, such as Payment Amount, Customer Email, Customer Phone, Reference, Return URL, and Description.
- Set an expiration date for the payment link.
Note: If you haven’t set an expiry date, the payment link will expire in 30 days by default.

* Indicates mandatory fields.
-
Select channels to share the link and preview the template by switching tabs.
-
Click Share.

A payment link will be generated and will be shared via the channels you have configured.
Import Payment Links
Instead of creating payment links one at a time, you can generate many of them at once by importing a file. This is useful when you need to collect payments from a large number of customers, such as for recurring fees, invoices, or bulk orders.
To import payment links:
-
Go to the Payment Links module.
-
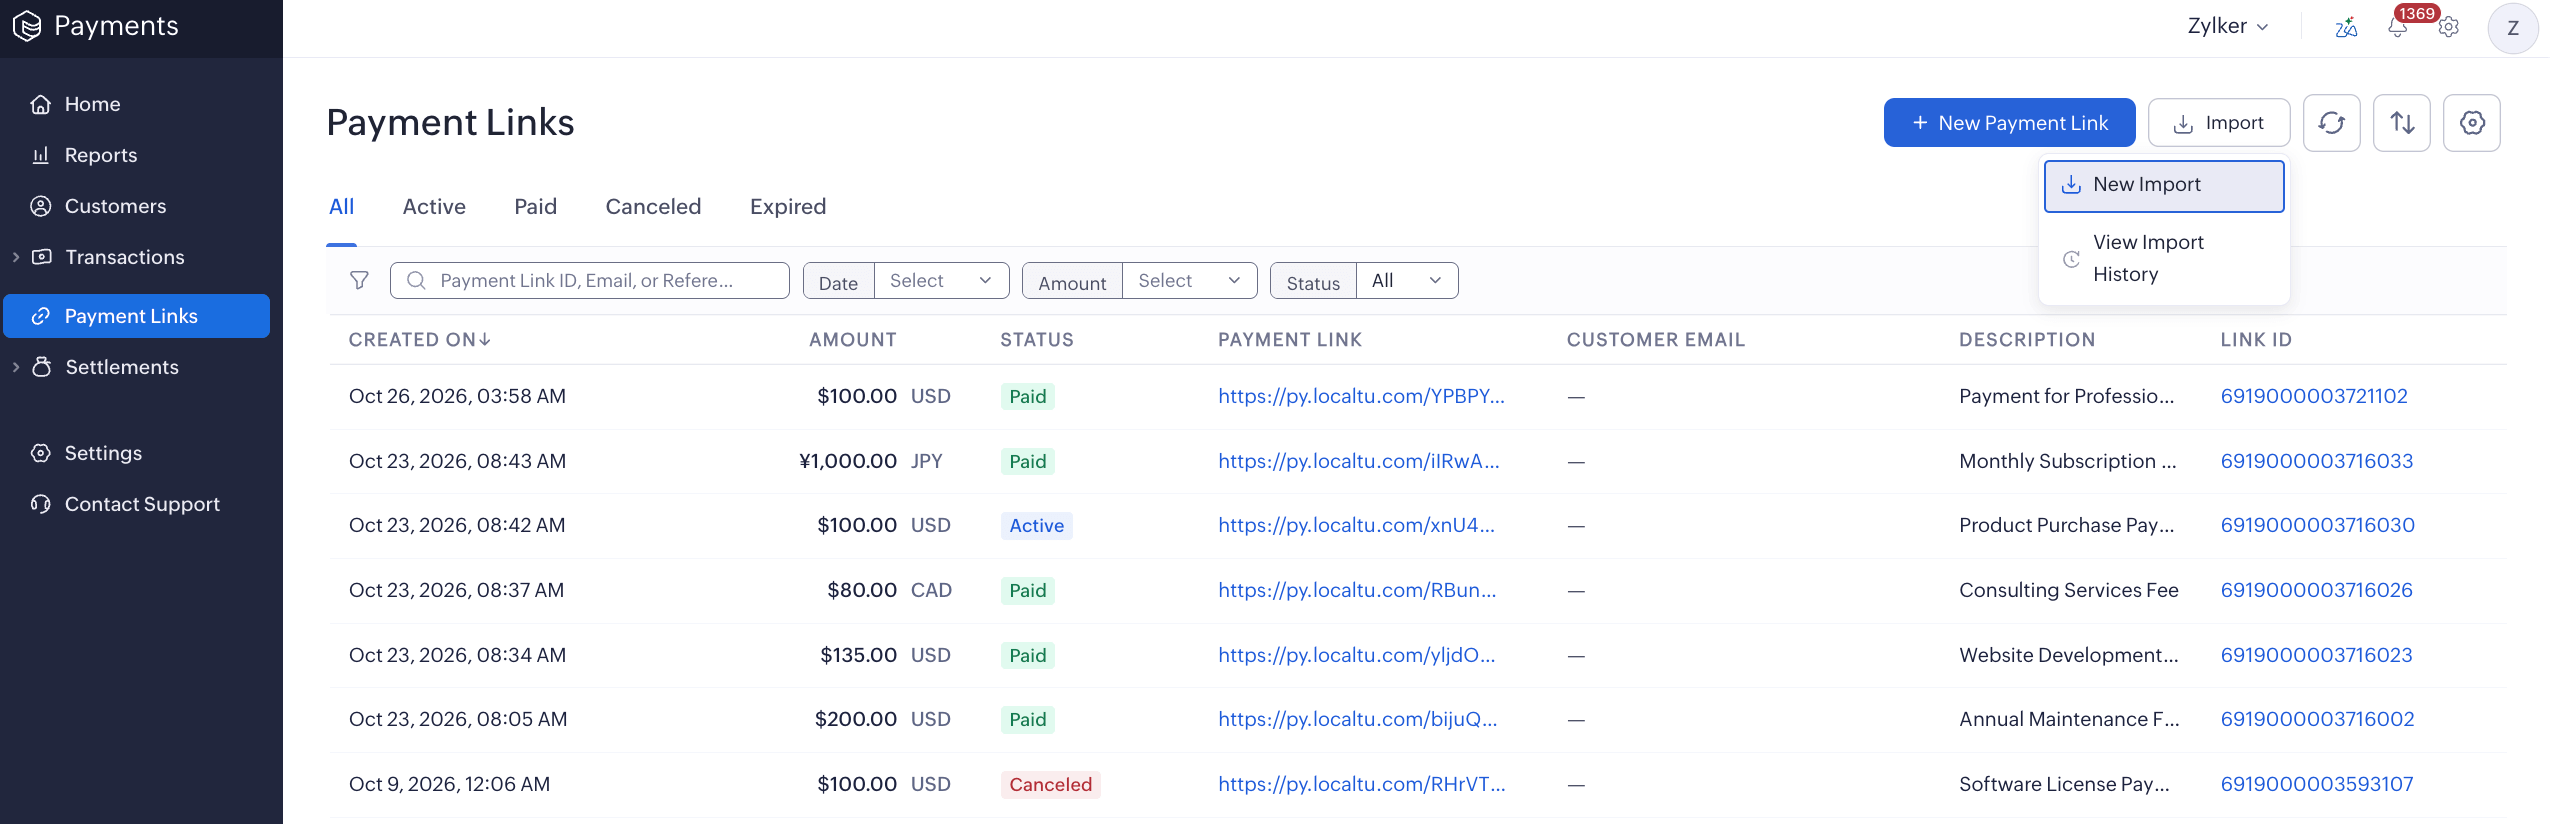
Click Import in the top right corner and select New Import.
-
Download the sample CSV or XLS file from the import window and use it as a template for your data.
-
Include all mandatory columns, such as Amount, Currency, and Description. Add a customer email address or phone number if you want to notify them via email or SMS.
Note: Ensure the fields in your file match the ones in the sample file. If a column or any required data is missing, the import will result in an error.
- Drag and drop your file into the import window, or click to browse and select it.
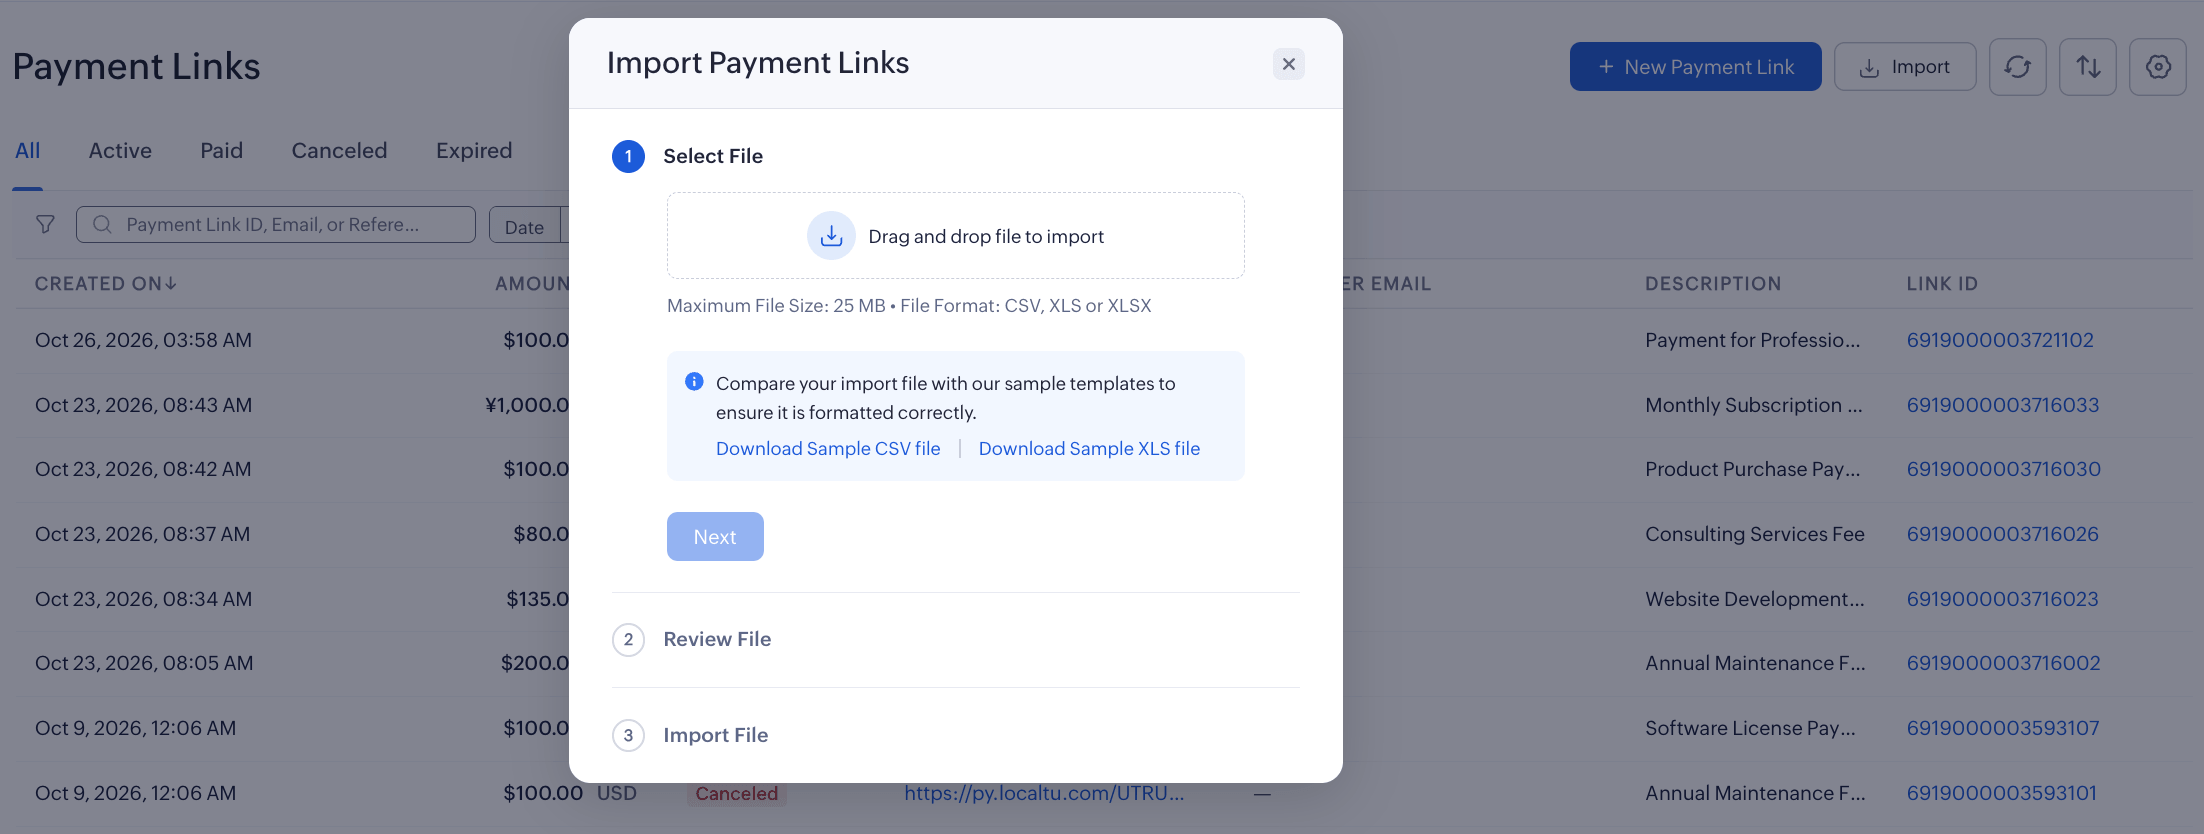
Insight: You can upload files in the CSV (Comma Separated Values), XLS, or XLSX (Excel Spreadsheet) formats, with a maximum file size of 25 MB.
-
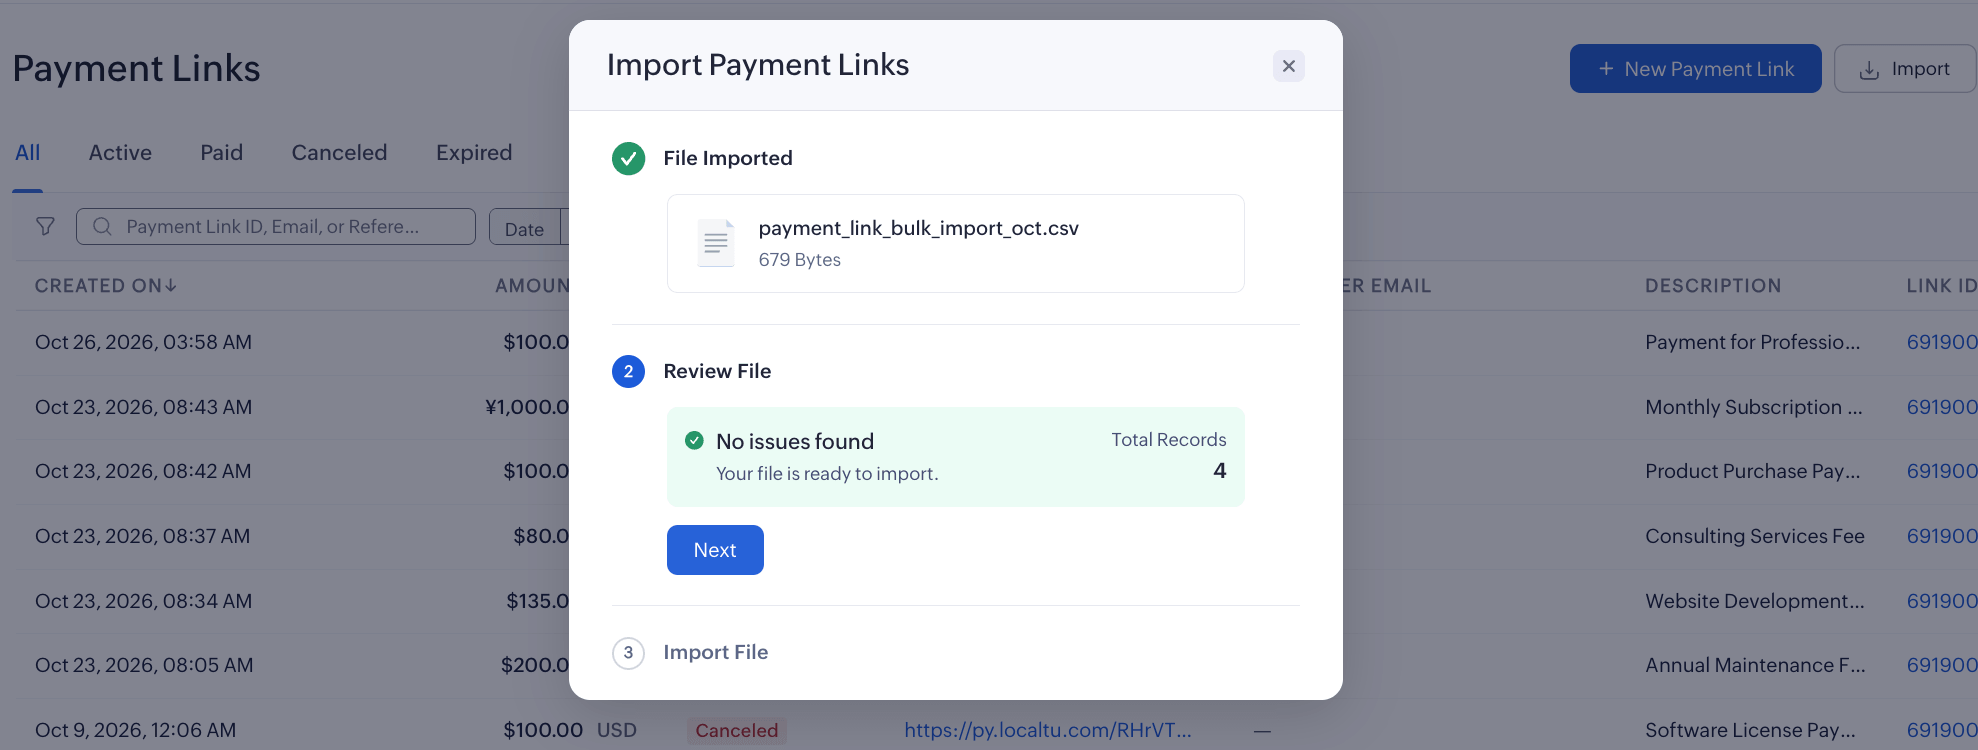
Click Next to validate your file. The number of records found in it will be displayed.
-
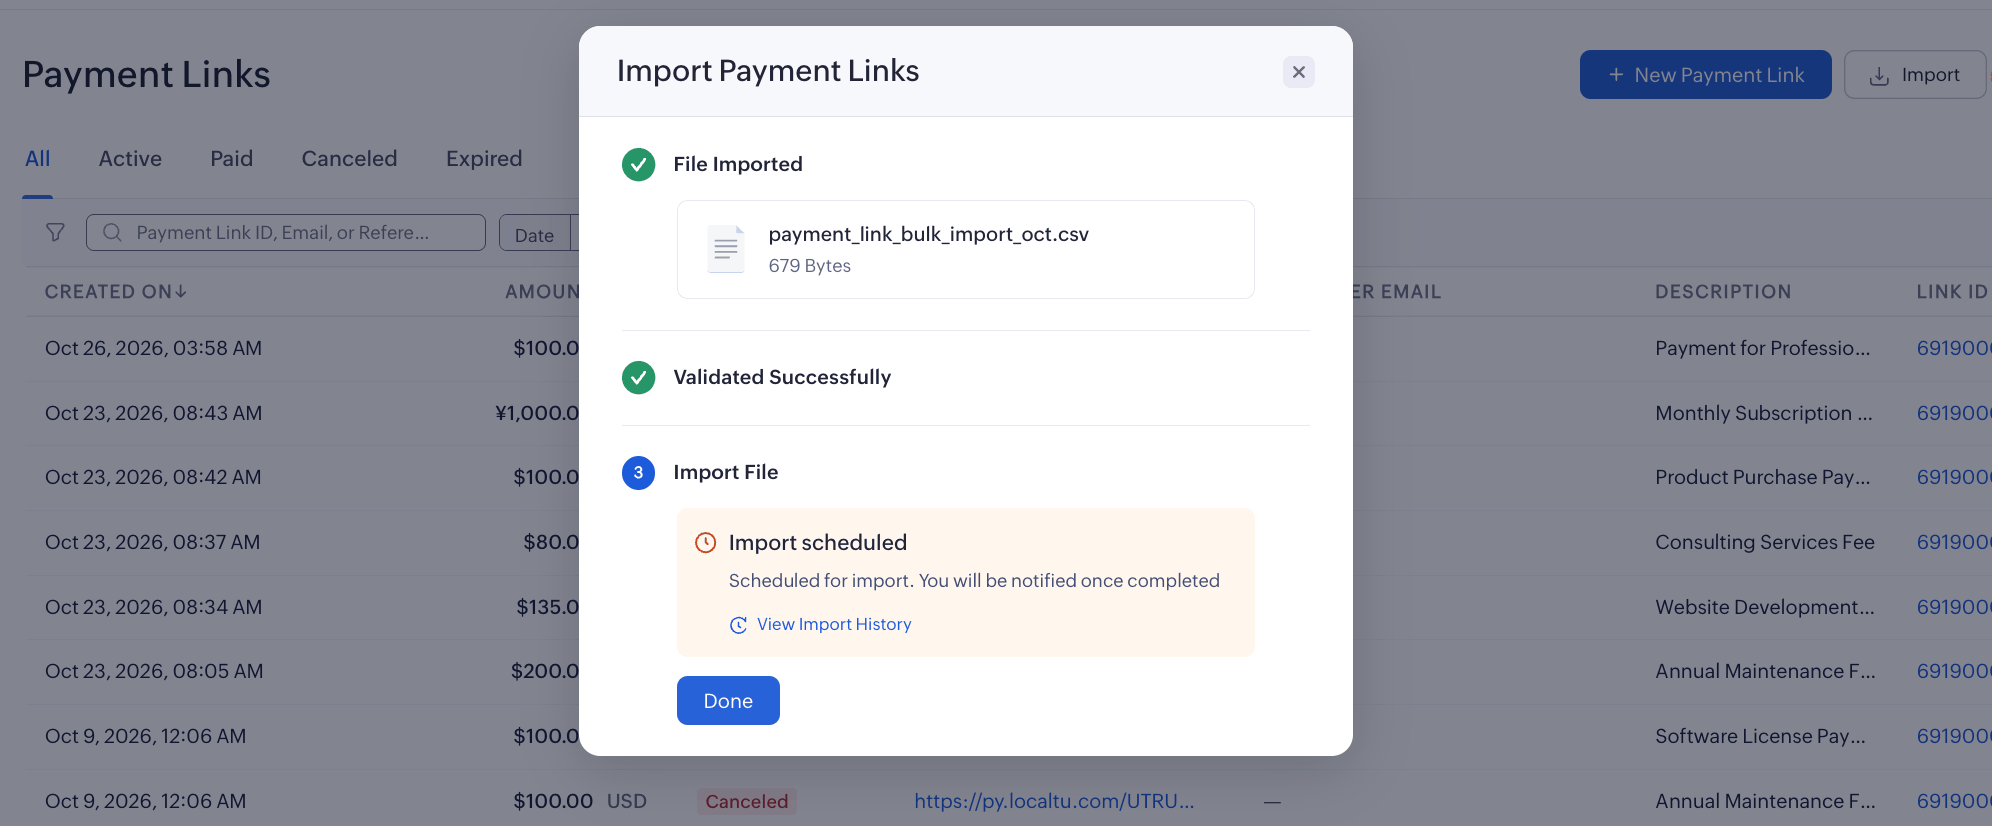
Click Next to start the import.
-
Click Done. You will be notified via email once the import is completed.
Insight: The import runs in the background, so you can continue working in Zoho Payments while your payment links are being created.
If any errors are found during file validation, correct them in your file and upload it again. If errors occur after the import begins, you’ll receive an email with a file listing the error codes and messages. Use it to resolve the issues, and then upload the corrected file again.
View Import History
You can track the status of every import and see how many payment links were created from each file.
To view the import history:
-
Go to the Payment Links module, click Import, and select View Import History.
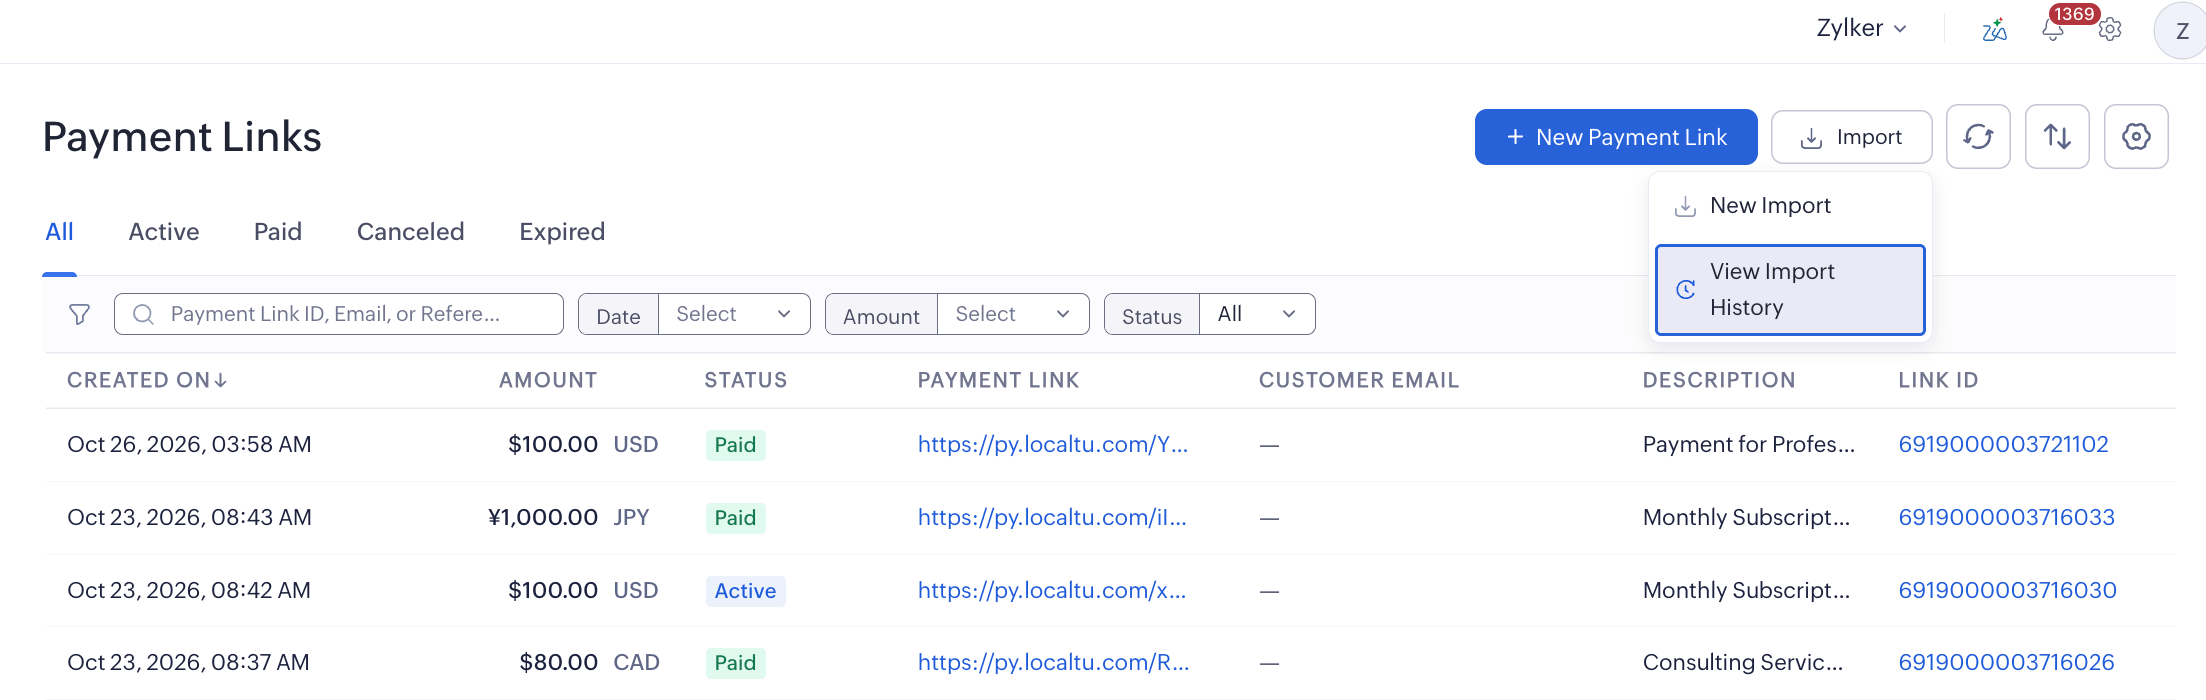
-
Click the Refresh icon to see the latest status.
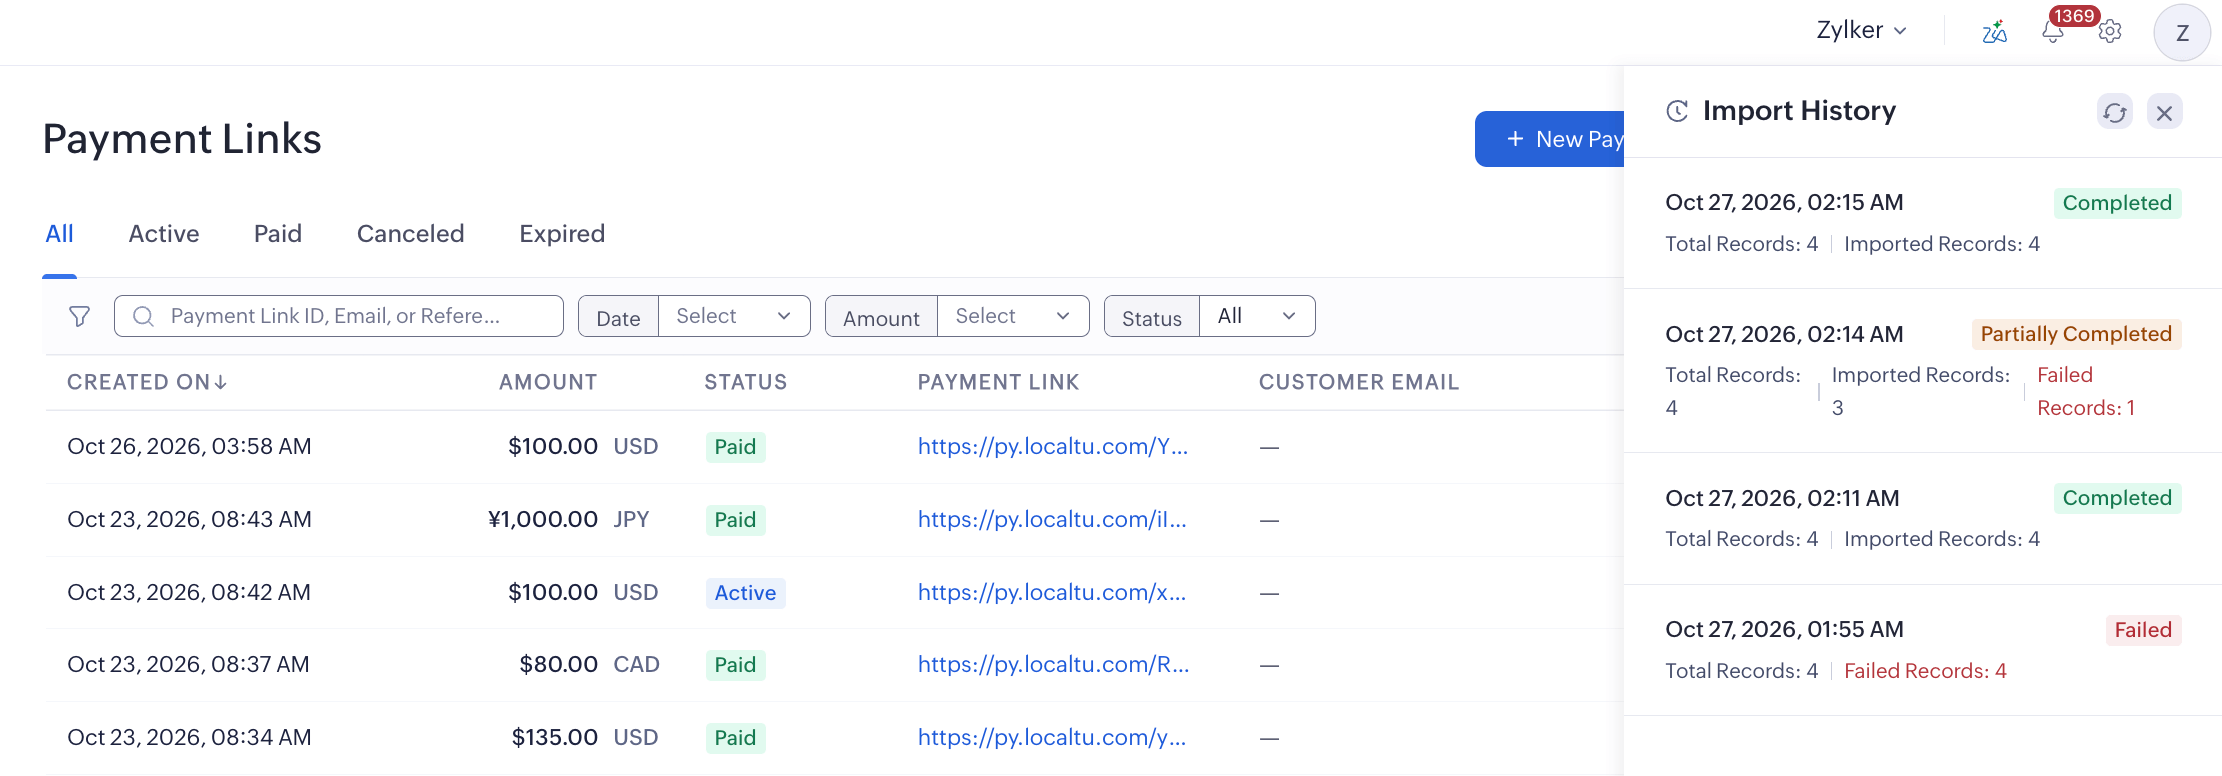
Each import will have one of the following statuses:
| Statuses | Description |
|---|---|
| Queued | You have imported multiple files, so this import is queued and will start once the earlier imports are processed. |
| In Progress | The import is being processed. |
| Completed | All records in the file were imported successfully. |
| Partially Completed | Some records were imported, while the remaining records failed. |
| Failed | None of the records could be imported. |
The total, imported, and failed record counts are shown for each import.
Share Payment Links
If you didn’t select the option to share the payment link when creating it, you can still send it to your customers in three different ways.
-
Share via Email: Click the Email icon to share the payment link, then confirm by clicking Send Email in the pop-up.
-
Share URL: Click the Copy icon next to the URL and share it with your customer through any messaging platform you prefer.
-
Share QR: Click the Download or Copy icon next to View QR Code and share it with your customer. Your customer can scan this code to make a payment. You can also click View QR Code and then download or copy it.

Get Paid via Payment Links
Once you create a payment link in Zoho Payments and share it with your customers, they can make an online payment through the link.
Here’s what your customers need to do:
-
Click the Payment Link sent to them.
-
Select their preferred Payment Method and enter the necessary details.
-
Complete the payment.

On successful payment, the status of the payment link will change to Paid on the overview page.

 Walkthrough of Zoho Payments personalized to your business needs